


How to Capture Motion Blur in Photography
Capturing movement and motion blur in photography is a great creative tool to make your images more dynamic. Learn how to do it well with 8 tips in this guide!
Learn | Photography Guides | By Andy Day
Motion blur is a technique used by photographers to convey a sense of movement in their images, using a slow shutter speed to give the idea that either the subject or the camera — or both — is in motion.
Motion blur can be used creatively to produce effects that the human eye cannot see and can only be captured by a camera.
It can bring life and energy to your photographs, allowing you to create dynamic and impactful images.
This article will explain how to capture movement with motion blur and give a few examples of how you can put it to good use.
Table of Contents
What is Motion Blur?
Motion blur in photography is the streaking effect you see in an image that is the result of movement.
This can happen when the subject of a photograph is moving, or when the camera itself is in motion during the brief moment when the image is being captured.
When a camera takes a photograph, the film or sensor is exposed for a period of time. Often, this exposure window is very small — what we would call a fast shutter speed — which freezes any motion.
If we create a longer exposure by using a slower shutter speed, any movement — whether that’s something in front of the lens that’s moving or even the camera itself — will create the streaking effect.
If the camera moves, the entire scene will show motion blur (unless the scene is moving with it, of course!).
Motion blur photography can give a sense of drama, conveying a sense of the speed at which something is moving.
Alternatively, it can also invoke a sense of peace as it might present clouds or fast-moving water smoothed out as a result of their movement, suggesting that the image is calmly allowing time to pass.
8 Tips for Capturing Movement for Motion Blur Photography
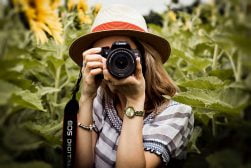
1. Use a slow shutter speed
© Jurien Huggins
The shutter speed is the length of time that your camera’s sensor or film is exposed to the light coming in through the lens.
In most photography, the shutter speed is comparatively short, aiming to freeze motion and create a crisp, sharp image, as motion blur in photography is something that you’re typically trying to avoid.
For motion blur photography to deliberately give a sense of movement, you need to slow this shutter speed down.
What constitutes a slow shutter speed very much depends on what you are photographing: 1/500th of a second will be quite quick for photographing someone walking, but relatively slow for photographing the wings of a hummingbird, for example.
For example, if someone is running past your lens, 1/500th would freeze them, while anything slower will probably capture motion blur.
Often, it will require some trial and error to figure out what settings to use to create motion blur for any particular scene, but as you grow in experience you will be able to make better, more educated guesses.
Motion blur photography can often feel like an inexact science!
Keep in mind that the slower your shutter speed, the more blurred and indistinct that person will become. Something like a 5-second exposure might cause your running subject to disappear completely as if they were never there.
Indeed, this is a great technique for making subjects ‘disappear’ at popular tourist destinations – using slow shutter speeds, often in conjunction with an ND filter and tripod, will effectively make any moving tourists vanish.
Remember: if you change your shutter speed, you will need to change your aperture and ISO accordingly in order to correctly expose for your scene. This is one of the fundamentals of the exposure triangle (see guide).
How Much Do You REALLY Know About Photography?! 🤔
Test your photography knowledge with this quick quiz!
See how much you really know about photography...

2. User shutter priority mode
© Sean Foley
The easiest way to take control over your shutter speed to capture motion blur is to use Shutter Priority mode.
This means that you will tell the camera which shutter speed to use, and the camera will automatically make changes to the aperture in order to get the right exposure.
Some cameras also have the option to set the ISO to Auto. This will give your camera’s automation even more flexibility to get the best quality images while giving you the settings that you want.
3. Stabilize your camera

© Patrik Tuka
Using slow shutter speeds doesn’t always mean that only your subject is blurred due to motion; it can also make it so that everything else is blurry because you can’t hold your camera still enough.
It might feel like you’re holding it completely motionless, but slowing down your shutter speed can mean images become blurry as a result of camera shake.
It’s not unusual to look at the photos on the back of your camera and assume that they’re sharp only to get home, copy them to your computer and realise that everything is blurred because of camera shake! Always zoom in on your images to check for sharpness.
There isn’t a specific shutter speed where camera shake starts to happen. As well as how steady your hands are, it is determined by the length of the lens that you’re using (the longer the lens, the more susceptible it is to camera shake) and whether the lens and/or the camera has any built-in stabilization.
If your camera has great IBIS (in-body stabilization), you might find that you can hand-hold your camera with a 35mm lens at shutter speeds as low as 1 second or even slower.
This also depends on how well you can stabilize yourself, maybe leaning against a lamppost, or setting the camera down on a wall.
Better still, use a tripod for any long exposure shot. If that feels like a lot to carry, even a monopod can make a difference.
4. Use a neutral density filter
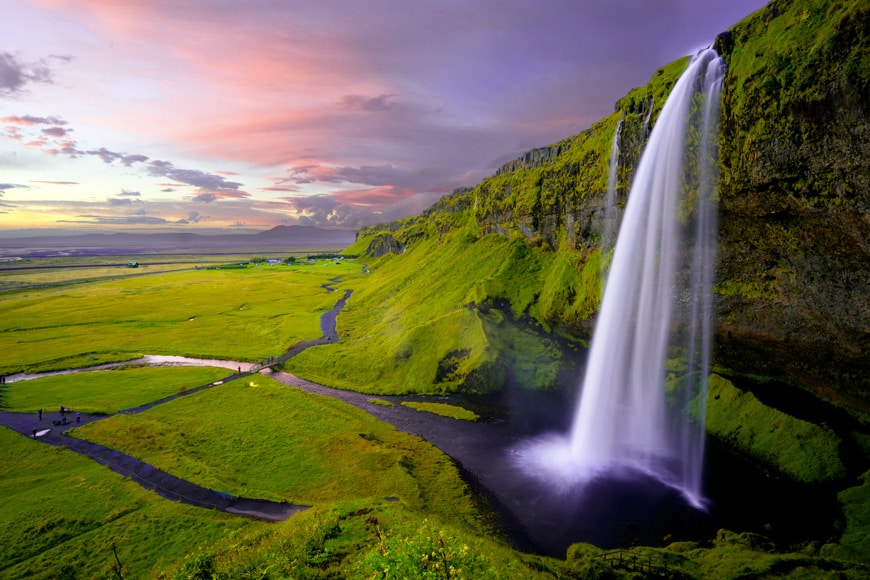
© Robert Lukeman
If you’re photographing a waterfall in full daylight and want to use a low shutter speed to blur the movement of the water, you might find that your smallest aperture and lowest ISO setting don’t allow you to use a low enough shutter speed to create a correctly exposed image.
If you’re using your camera’s Shutter Priority mode, you might find in this scenario that you simply can’t scroll the shutter speed to what you want.
Alternatively, you might find that while the water in your images has motion blur, all of your photos are overexposed.
In this situation, there is simply too much light entering the lens for you to be able to capture a correct exposure with a slow shutter speed. You can wait for the sun to set, but another solution is to use a neutral density filter.
ND filters screw to the front of your lens and reduce the amount of light into your camera, but without making any other changes (hence “neutral”). For the camera, the scene will appear darker and this will allow you to use slow shutter speeds (ie. a long exposure).
For more tips on using ND filters, check out our guide to camera lens filters.
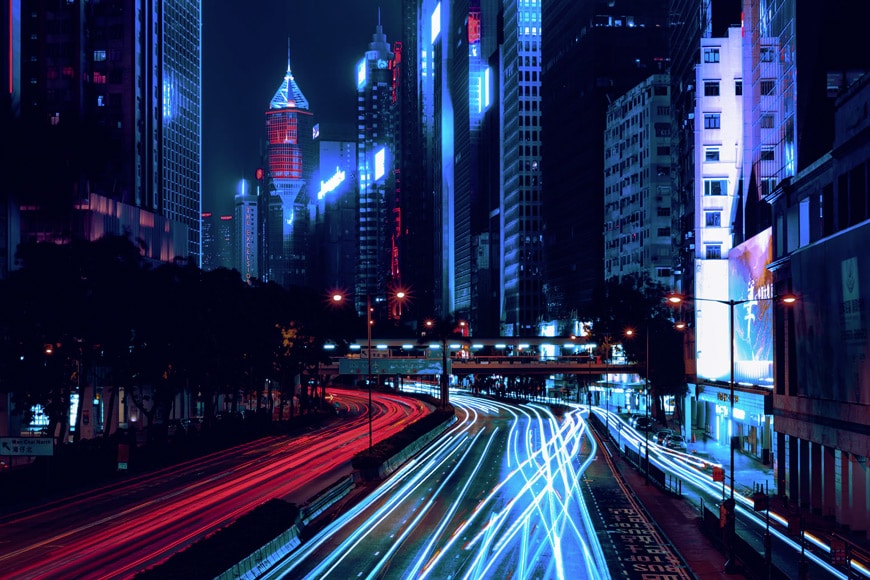
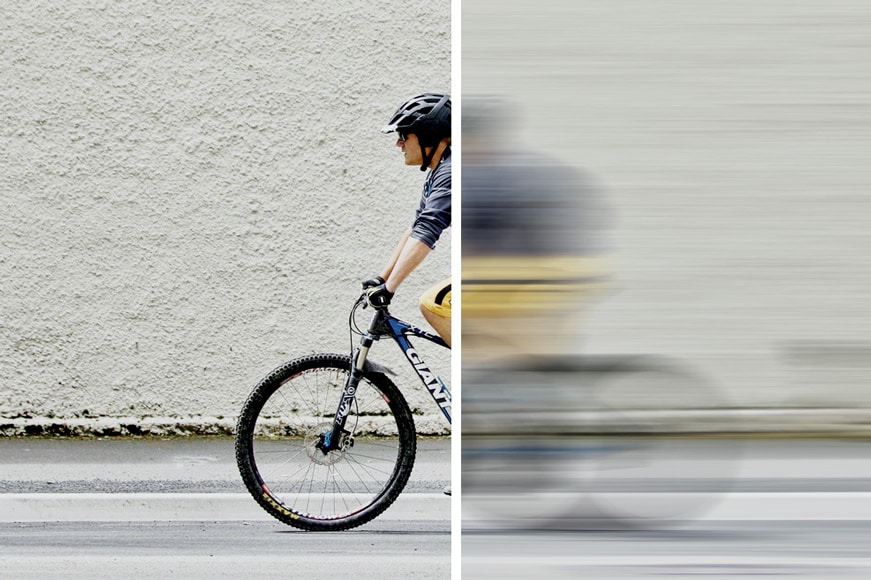
5. Pan your camera
© Max Bender
A popular method for creating dramatic photographs of sports or street scenes is to track a moving subject by panning the camera as the subject goes past you.
The best results in panning occur when the movement is at right angles to you — i.e., the subject is going from left to right or right to left, but not moving towards or away from you.
Choosing a slow shutter speed that works with your scene can be about experimentation. For someone running past you, try 1/30th of a second to get started, or check out our article on panning photography settings for more ideas.
In order to expose correctly, use a small aperture and a low ISO to balance out the low shutter speed.
Keep checking the motion blur effect on the back of your camera after each shot and make changes accordingly. If there’s not enough blur, reduce your shutter speed; if there’s too much blur, increase it.
If possible, set your camera settings to continuous autofocus and try using the fastest burst speed in order to take a number of images as the subject passes you. This will increase the odds of capturing a sharp image.
Try to match your camera’s pan exactly to the movement of the subject as otherwise the subject will be blurred. Getting good motion blurring results of only the subject is often a matter of practice!
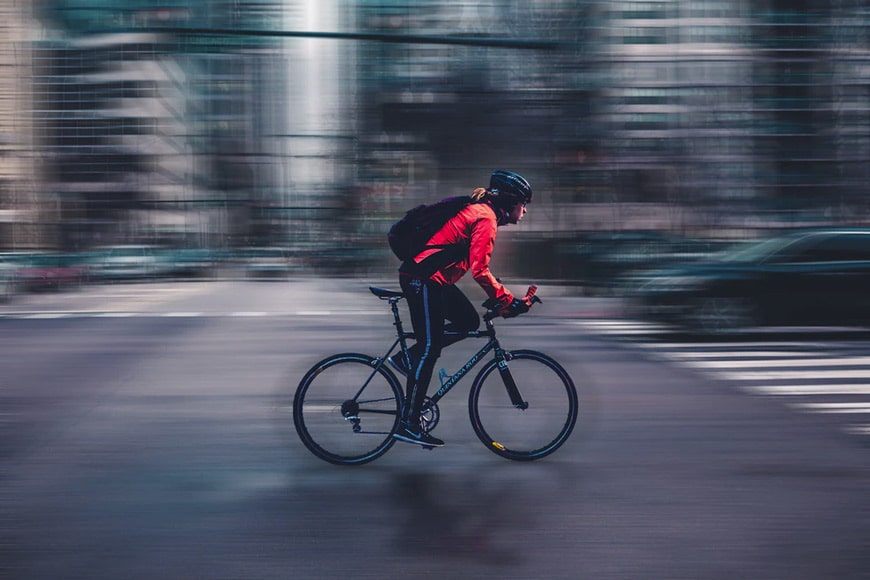
6. Move yourself and your camera

© Gijs Coolen
Panning your camera isn’t the only way to blur the world around you — you can also move yourself.
This can be particularly effective if you include something in the frame that is travelling at the same speed as you — perhaps part of the vehicle in which your travelling, or another vehicle that’s close by.
You might have to experiment to find out which shutter speed keeps your subject sharp while creating motion blur in everything around it while conveying the full sense of speed.
Be responsible! Make sure that someone else is driving and that you aren’t leaning dangerously out of a vehicle’s door or window.
If you want to capture an image like the one above, make sure to use a mount for your camera that leaves your hands free and your mind on the road.
7. Use Photoshop’s Motion Blur filter
© Yolanda Sun
Trying to blur motion using editing software isn’t ideal but Photoshop does a pretty good job.
Select Filter, Blur, and Motion Blur to open up the dialogue. From here you can choose the angle and the intensity of the motion blur effect.
There are also free Photoshop Actions that attempt to replicate photography motion blur for you, although it’s good to experiment manually first to see what you can achieve.
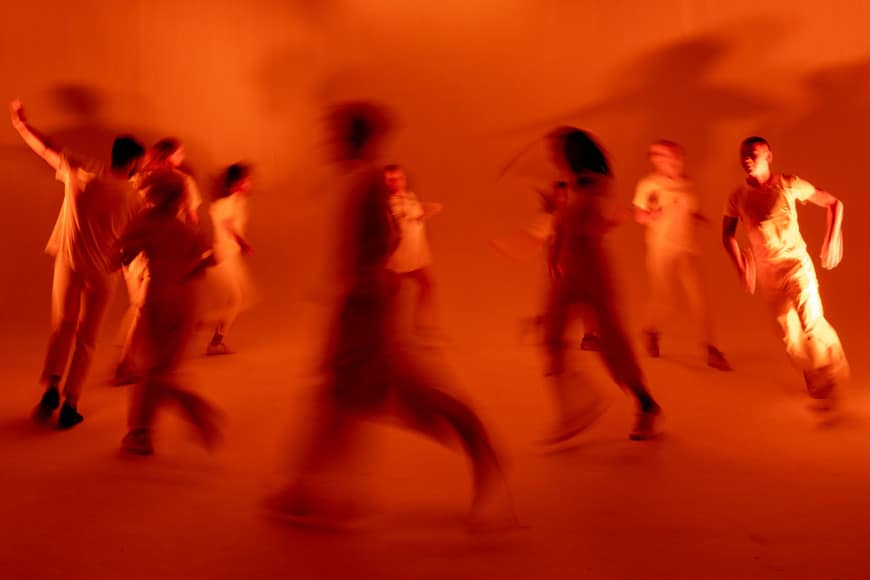
8. Use slow sync flash
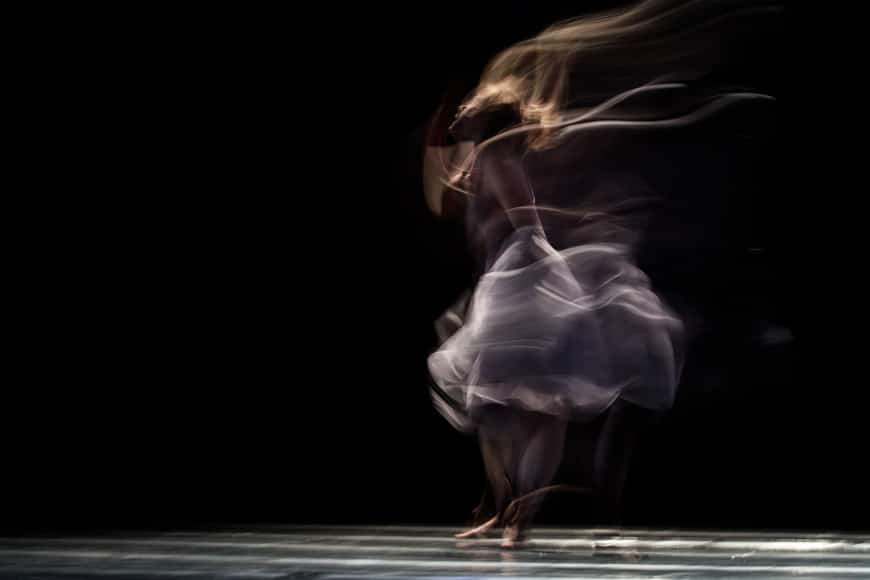
© Ahmad Odeh
Combining a long exposure with a flash can create some interesting results, allowing you to combine motion blur created through the long exposure with a frozen subject that is captured by the strobe of light.
Take the HARD Photography Quiz! 🤯
Now it's time to really test your photography knowledge!
(99% of people can't get all the questions right...)

Even if you use a slow shutter speed, a flash only fires for a very short duration by comparison and will make your subject appear frozen.
It can work great for sports, but keep in mind that you will need to be quite close to your subject for the flash to illuminate them.
Some camera flashes will allow you to decide when the flash fires — just after the camera’s shutter opens, in the middle of the exposure, or just before it closes, aka “rear curtain sync”, which will create a blurry trail showing where your subject has moved before being ‘frozen’ by the flash.
You might even be able to fire the flash several times while the camera shutter is open, creating multiple exposures that are connected by a trail of motion blur.
As always, keep your camera steady by using a tripod or monopod, or finding a stable surface on which to place it.
Motion blur photos created with flash are often the most intriguing since the results are usually other-worldly or ghost-like – as in the example photo above.
Motion Blur Photography FAQs
Can you fix blurry photos?
Editing software has long been trying to fix blurry photographs and current technology is better than ever. There are a number of apps that you can try, some of which are now using machine learning to figure out how your image should look if it were not blurry.
What is an example of a slow shutter speed?
A slow shutter speed is a relative term and depends on what you are photographing. To turn flowing water into a blur might need several seconds, whereas someone running past your camera will be blurry with a shutter speed of 1/30th of a second.
By contrast, to show the trails of stars, you might expose for more than a minute.
What shutter speed stops motion?
Freezing the motion of a subject depends on how fast that subject is moving. 1/60th of a second might freeze a waterfall, but you may need to increase your shutter speed to 1/500th of a second in order to photograph someone sprinting past your camera and avoid motion blur.
How can I reduce motion blur?
Motion blur occurs when your shutter speed is too slow for your subject’s movement. To reduce motion blur, increase your shutter speed
How can I sharpen a blurry photo?
Several apps are available to sharpen a blurry photograph but we would recommend Photoshop. You can read about the process here.
Final Words
Photographing motion blur can be a fantastic way of introducing drama and dynamism into your photos, giving a sense of urgency and speed.
Equally, motion blur can be about evoking a sense of calm through showing the passage of time, turning passing clouds or flowing water into smooth, creamy textures that give a feeling of tranquillity.
Whichever you choose, hopefully, this article has given you a good basis from which to start. If you have any questions or thoughts, be sure to leave a comment below.

Check out these 8 essential tools to help you succeed as a professional photographer.
Includes limited-time discounts.


Andy Day is a British photographer and writing, living and working in France, specialising in adventure, travel, architectural and landscape photography.

WELCOME TO SHOTKIT
Enter your email to be sent
today's Welcome Gift:
19 Photography Tools
🔥 Popular NOW:


Shotkit may earn a commission on affiliate links. Learn more.