Olympus OM-D E-M5 Mark II Camera Review
In-depth review of the Olympus OM-D E-M5 Mark ii camera with travel photos. The best camera for travel photography & street photography is put to the test.,
This is a review of the Olympus OM-D E-M5 Mark II. I had a bit of trouble deciding what to title the post though…
You see, after using the Olympus OM-D E-M5 Mark ii solidly for a month whilst traveling in Europe, I am confident that this little camera is one of the best travel cameras available today.
By this I mean a camera that is small, light, weather-proof, tough, fast and of course, takes a great picture. If it’s affordable too, that’s a big plus.
Despite the emergence of many other great micro-four-thirds cameras over the years since the release of this, the OM-D E-M5 Mark II continues to be one of my favourites.
Olympus OM-D E-M5 Mark II Review
Here’s a condensed version of this review. If you are:
a) someone who doesn’t know anything about cameras but wants to take great photos
b) a pro who wants a second camera for travel/street photography/fun (e.g. me).
c) someone who wants arguably the best compact camera for professional photographers
Here is all you need to know:
The Olympus OM-D E-M5 Mark ii allows you to take interesting and creative photos much easier than any other camera I’ve ever used. It makes photography easier and it makes it a lot of fun.
If you have $1,000 to invest in a compact camera that has better functions than any DSLR and excellent image quality, the Olympus OM-D E-M5 Mark ii is the camera to get.
Unless you’re a pro or a serious hobbyist, don’t waste your time with a DSLR, especially if you’re a parent. Trust me on this – a bulky camera will never leave your camera bag.
Save Time – Here’s My Recommendation
If you wanted just one all-round lens, I’d go with this body + Olympus 12-40mm f/2.8 lens kit for the most versatility.
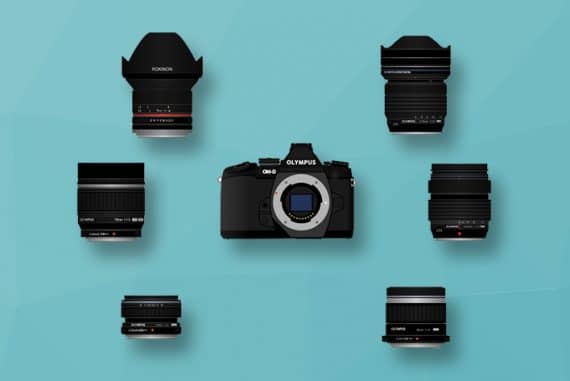
As for other lens options, if you’re a prime lens user, I’d recommend the Olympus 17mm f/1.8 to start with, the Olympus 12mm f/2 as a wide angle and the Panasonic 42.5mm f/1.2 if you want some amazing low light performance.
If you prefer the convenience of zoom lenses, I’d recommend the amazing Olympus 40-150mm f/2.8 and the Olympus 12-40mm f/2.8 – with those two, you’re pretty much sorted for wide angle all the way through to telephoto.
Check out more of the best Micro Thirds lenses for my opinion on the best bang for your buck MFT glass ;-)
If you’d prefer to shop with B&H Photo, click the button below to read more reviews on the Olympus OMD-EM-5 Mark II and get the best price there.
My Experience with Mirrorless Cameras

Left: Olympus OMD-EM5 Mark II | Right: Fujifilm X100S
I wasn’t expecting to like the Olympus OM-D E-M5 Mark ii. I’ve tried plenty of mirrorless cameras, and they all seem to annoy me, usually in one important aspect – the autofocus.
I own the pseudo-range-finder Fujifilm X100V camera, which is extremely popular (especially amongst pros) for its gorgeous looks, a high speed leaf shutter which allows you to do incredible things with flash, and most importantly the incredible image quality you can get straight out of camera.
However, I don’t care what anyone says, the auto focus on the Fuji is still a little lacking. I use single point AF, and whilst the Fujifilm X100V keeps up in decent light, it’s still way slower than any dSLR to grab focus.
Then there’s the auto focus for moving subjects…omg. Anyone who says the X100V is great for street photography is obviously shooting things that are static, which in my opinion isn’t real street photography.
The much loved Fujfilm XT-1 has slightly better AF (especially with recent firmware updates), but it’s still nowhere near a DSLR.
I agree completely that these type of mirrorless camera can be used professionally, but only if the subject is static. Wedding Photographers who use the XT-1 are, in my opinion, sacrificing a lot of the story in favour of still shots.
So in summary, I think small mirrorless cameras are great. They’re small and can produce excellent quality images. However, the focus system on any DSLR is usually far better.
That is, until now…
The Olympus OM-D E-M5 Mark ii – Intro
There are a few caveats, but here’s why I think the Olympus OM-D E-M5 Mark ii is:
- the best mirrorless micro 4/3 camera
- the best camera for travel photography
- the best camera for street photography.
Rather than bore you with an in-depth review of every detail of the Olympus OM-D E-M5 Mark ii, I’ve decided to highlight what are in my opinion the most amazing features of this camera.
Then I’ll round it off with what I didn’t like so much.
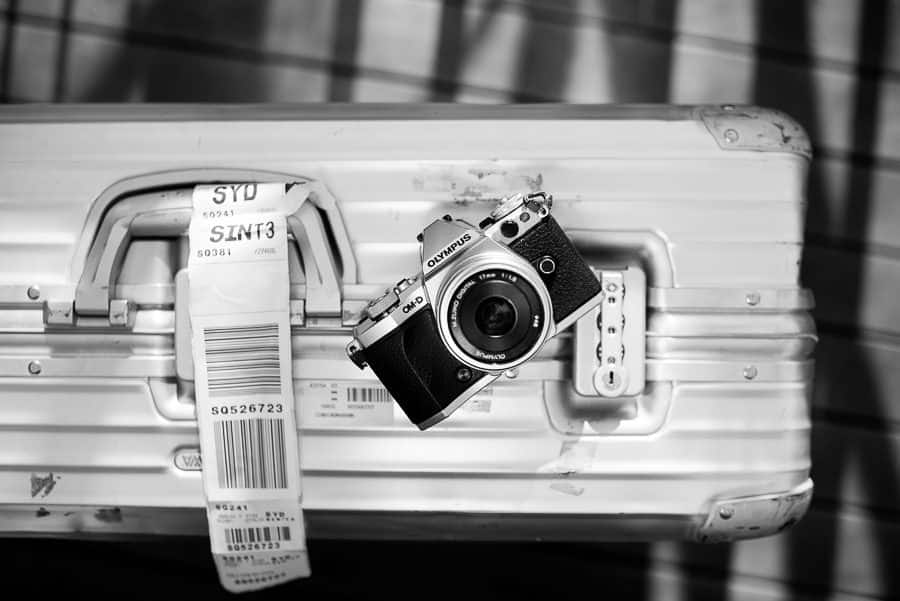
I’ve included photos I took on my one month family holiday around Europe. Bear in mind that I was always with 3 other people and our baby, so had little time for each shot.
I think this makes the review more realistic, and hopefully shows what you can achieve with the Olympus OM-D E-M5 Mark ii as a travel camera in an everyday situation.
Olympus OM-D E-M5 Mark ii – What I liked
1. Size/Weight
Let’s get this one out the way first. Mirrorless cameras are much smaller and lighter than dSLRs. I wouldn’t say they’re ever ‘pocketable’, but you can hang one around your neck or off your wrist all day without any issues (this is what I did).
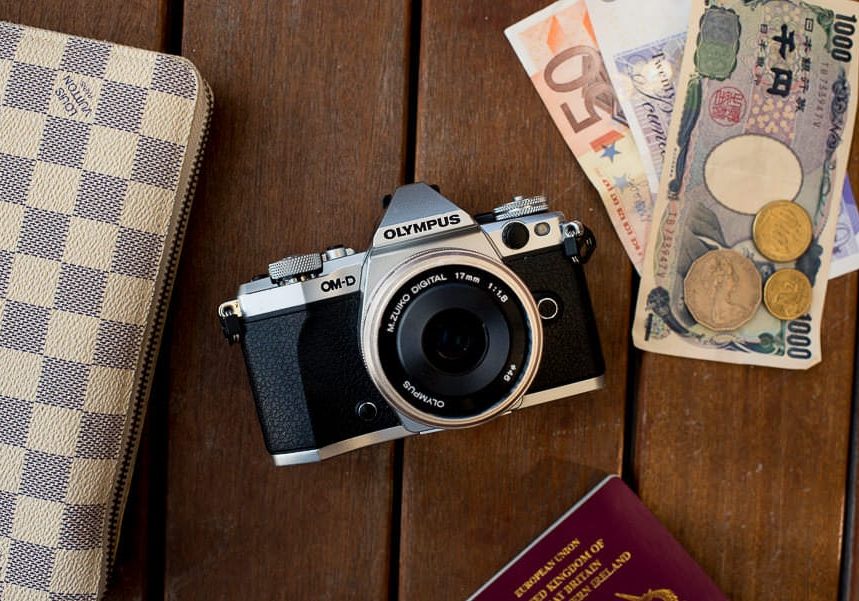
The Olympus OM-D E-M5 Mark ii allows you to change lenses. There are lots of lens options available, but I chose the excellent Olympus M.Zuiko 17mm f/1.8 which balances perfectly on the Olympus OM-D E-M5 Mark ii.
Sticking a heavy zoom on a camera of this size kinda defeats the purpose for me, so I wanted to couple the Olympus with a prime (non-zoomable) lens, and the Olympus M.Zuiko 17mm f/1.8 fit the bill perfectly.
The field of view is roughly 35mm which is a perfect all round focal length, and the lens is sharp and fast. It also exhibits some lovely flare.

I won’t dwell on lens choice as it’s very subjective, but if you want my advice, invest in the Olympus M.Zuiko 17mm f/1.8 and leave it on your Olympus mirrorless camera forever. Just because you can change lenses doesn’t mean you have to ;-)
As for the weight, the Olympus OM-D E-M5 Mark ii + the Olympus M.Zuiko 17mm f/1.8 is 648g (467g + 181g). By comparison, the average dSLR + lens is well over 1kg.
A camera needs to have a certain weight to it, otherwise it feels too much like a toy, and can actually be harder to use. The set up I described above is just right – not too heavy, not too light, and very well balanced in the hand.
2., Image Quality – JPEG
How a photograph looks is pretty much the most important factor when buying a camera. There are so many cameras that are a pain in the ass to use, but the image quality is so good (or has some intangible quality to it) that we put up with the shortcomings of the camera body.
I own the Fuji X100S and I’ll be the first to admit that it’s very annoying to use. The original X100 was way, way worse, but it still sold like hot cakes. Why? Because the image quality is excellent.
When I got hold of the Olympus OM-D E-M5 Mark ii, I knew that the body would blow the Fuji out of the water. It just felt right in my hands. However, I thought that the image quality would fall short.
I thought that I wouldn’t have the confidence to shoot it in jpeg mode like I do the Fuji, safe in the knowledge that White Balance wouldn’t need correcting in post, and the jpeg colours would be good enough to be usable straight out of camera.
How wrong I was.

This looks like it’s been edited but it hasn’t – it’s just a nice pocket of light down an uninteresting street.
Remember, these are JPEGs that are straight out of camera. All I’ve done is added contrast and sharpening in the camera’s settings, and resized them for this site.

An alleyway in Lucca, a beautiful little town in Tuscany.
Sure, they lack a bit of punch, but I still think the quality is very good considering there’s zero post processing, which meant zero time spent sitting in front of a computer for me :-)

The Trastevere neighbourhood on the west bank of the Tiber in Rome – highly recommended!
You may think the above photo looks a bit orange, but the afternoon light in Tuscany really is that colour – it’s beautiful. The Olympus OM-D E-M5 Mark ii nailed the white balance.
3. Image Quality – RAW
I shoot the Olympus OM-D E-M5 Mark ii on the RAW + JPEG Fine setting. That way I don’t have to waste my time editing any RAW files if I’m happy with how the JPEG looks, but I still have the RAW files to fall back on should I need to dig deeper into the dynamic range of the file, or fix the white balance.
If you can’t be bothered to mess around with the images on your computer after shooting them, just set the camera to JPEG and you’ll get great looking photos.
However, for those of you who’d like to see what this camera is capable of when you really push the RAW files, below is a test image I shot heavily under exposed (it was basically complete black), then brought back by 4 stops in Lightroom.
Ignore the bottom of the picture – it’s the edge of the wharf I was shooting from.

By comparison, here’s the same underexposed -> recovered image with my Nikon D750 (review), a full frame camera costing twice as much:

It’s only when you start peeping into the shadow detail that you notice the Olympus’s file struggling, but this is to be expected of a sensor that’s less than half the size (and cost) of the Nikon D750.
That’s the thing with this camera – you often forget that it’s a Micro 4/3 sensor, way smaller than a dSLR’s. The RAW files simply can’t contain as much data in them, so you can’t push and pull them to extremes like you could a full frame camera.
However, if you accept this, the RAW files out of the Olympus OM-D E-M5 Mark ii are excellent and you can have a lot of fun post processing them in Lightroom or Photoshop.
Here are some snaps from my holiday to give you a bit of an idea of what this camera is capable of.

Singapore Airport where we stopped to get a much needed break from the mammoth flight.

The flare from the Olympus 17mm f/1.8 is great!

Athens at 7pm – I was exposing for the sun in this shot, so pulled back some detail from the shadows in post.

Being able to preview the exposure on the LCD screen makes hunting for interesting light especially fun.

This is Tom who makes his living on a street corner in Athens, selling bicycles made out of wire for 1 Euro!

Harry gets a telling off! Underexposing is a cinch with live exposure preview

The Olympus retains a surprising amount of highlight detail for a small camera.

Shot from the ground – the sun shades of the cruise boat on the Bospherus in Istanbul

Here I tilted the screen 180 degrees and shot backwards

This is how the camera/lens handles a heavily backlit portrait

Exposing for the highlights is so easy on a camera with exposure preview

As the Olympus doesn’t need to be shot at your eye, you can get candid photos like this much easier

An example of the awesome bokeh at f/1.8 of the Olympus 17mm f/1.8 lens

Violinist on the streets of Florence
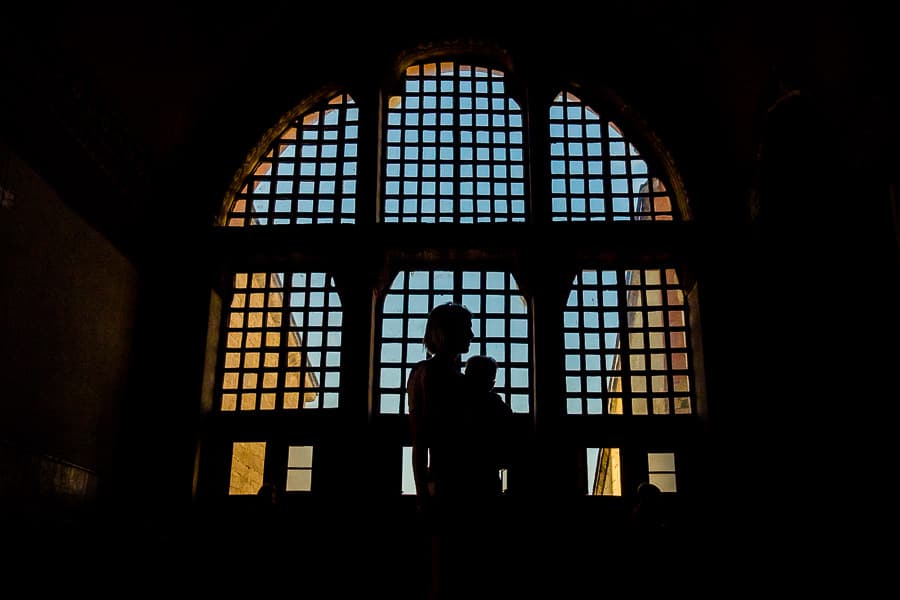
Inside the Hagia Sophia mosque in Istanbul
4. Flip Out Screen
Flip out (articulated) screens are in my opinion the most under rated feature on cameras today. In fact, the flip out screen on the Nikon D750 was one of the main reasons I got a couple for my wedding photography work.
At first you might think that having a flip out screen is a gimmick, but the more you use one, the more you’ll realise how many creative doors it can open.
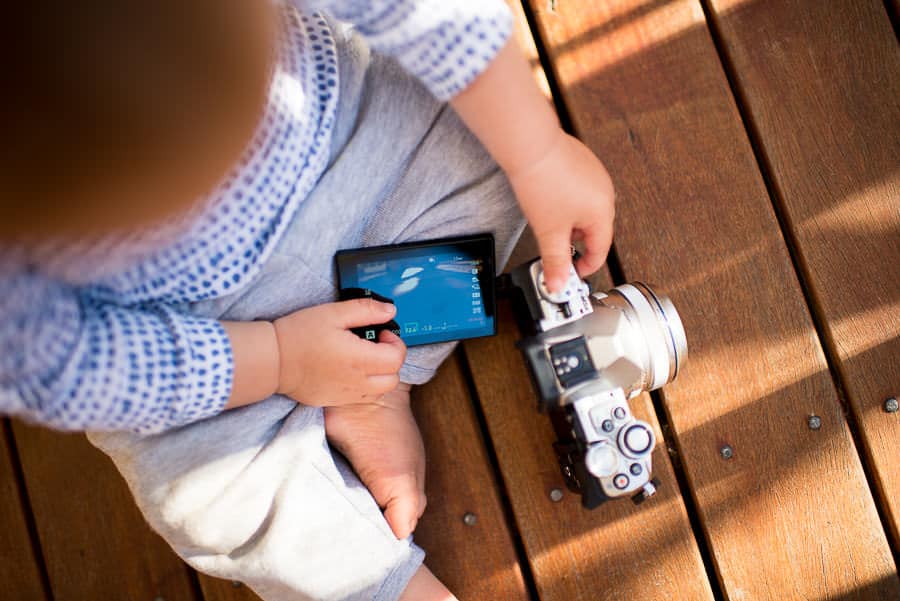
It’s so easy to take a photo using the flip out screen, even my 1 year old can do it!
The original Olympus OM-D EM-5 had a 90 degree flip out screen, but the new Olympus OM-D E-M5 Mark ii allows the screen to be flipped and swivelled 180 degrees.
I really don’t want to use the word ‘selfie’, but being able to compose a shot pointing the camera at yourself can be handy, and if you have children it’s especially fun.

My son and I at Lake Vouliagmeni in Athens – the fish in the lake nibble at the dead skin on your body!
Shots like the ones below would have been very awkward without the flip out screen of the Olympus.
The screen encourages you to take photos from unusual angles, allowing you to get very close to the ground for some creative perspectives.

The Duomo in Milan – luckily the rain meant the queue was only 1/2 hour rather than 4 hours!

Istanbul from the Bosphorus River. This shot taken was 1 inch from the water. The weatherproof body of the Olympus helps with splashes.
However, having a flip out screen is only part of the equation of the awesomeness of the the Olympus OM-D E-M5 Mark ii!
The other feature that goes hand in hand and makes this camera the best camera for street photography (as well as all kinds of other ‘stealthy photography genres) is…
5. Touch Screen Focus/Shoot
I’m so excited to about this feature! Every time I use it I love the Olympus OM-D E-M5 Mark ii a little bit more!
Ross Harvey who uses the original Olympus OM-D EM-5 for street photography showed me this feature last year.
When you try it in person though, it’ll blow your mind! It really does make every other touch screen camera seem dated in comparison, and also makes the Olympus OM-D E-M5 Mark ii very easy to use for anyone.

The ice cream vendors in Istanbul put on a show for every customer which consists of snatching the ice cream from your hand until you’re sick of it!
So what do I mean by ‘touch screen focus/shoot’? Well whilst anyone with a mobile phone is familiar with touching the screen to tell the camera where to focus, but the Olympus OMD cameras take this one step further by focusing, exposing and taking the photo all in a millisecond.

If you’d like to control the exposure, you can of course do this in Manual mode, but just to illustrate how useful this feature is, imagine being outside with the Olympus. You’ve swivelled out the flip screen so you can look down onto it and shoot from the hip.

People around you would think you’re just checking your photos, but little do they knew, you’re composing your shot so that when an interesting subject walks past, you touch them on the screen and BAM! Focus and Shot in less than half a second!

If you’ve got the sound off (incidentally, the shutter sound effect is gorgeous), your photo was 100% invisible.

This was at rush hour on a main road in Istanbul. These cops were very stressed, so I was pretty nervous getting this shot. Luckily the Olympus is silent and fast.
This is pretty much the main reason why I think the Olympus OM-D E-M5 Mark ii is the best camera for street photography. After all, being invisible is the name of the game if you want to get those decisive moments.

Locals crowd around to buy a grilled fish sandwich with fish freshly caught from the Bosphorus River
I’ve interspersed this section with photos I took using this function while I was in Istanbul. Remember that I’m using the equivalent of a 35mm lens, so I’m less than a metre from the subject in most cases, and I didn’t even get in one fist fight! Not even with these kids!! :p

Talk to the kids, but shoot from the hip – only one of them knew what I was up to!
Perhaps in the comments other users can let me know if any other camera allows touch to shoot functionality, but I’m pretty confident Olympus was the pioneer back in 2012 when the original Olympus OM-D EM-5 was released.
As a side note, be sure to turn ON the camera’s Exposure Preview in Live Mode. Confusingly, Olympus calls this ‘Live Boost’ and you must set it to OFF.

Shooting with Live View and being able to preview the exposure before you take the shot feels like cheating, and can really help amateurs understand how ISO and Shutter Speed will affect the exposure of their picture.
6. Auto-Focus
Whether you use the touch screen or the brilliant Electronic View Finder (i.e. looking through the ‘eye hole’ like you would a regular camera), the focus on the Olympus OM-D E-M5 Mark ii is nothing short of amazing.
As I said before, unresponsive and slow auto-focus on a mirrorless camera is a deal breaker for me and many other pros.
In street photography, or when you only have a split-second to take a photo, you don’t want to be waiting for your camera to focus.

This old man in Athens told me off for snooping around his car boot sale without buying anything!
With the Fujifilm X100s I was always unsure if I’d got the pic. I’ve heard some say they like this uncertainty as it makes the picture taking process more fun, but to that I say bollocks!
I want my camera to grab focus in a millisecond, take the photo, then I’m on my way whilst you guys have fun trying to get the shot.

A stall vendor of fake goods gets booked in a square in Florence
I’ve tried a few mirrorless cameras in this price range before, but the auto focus on the Olympus OM-D E-M5 Mark ii demolishes them all.
In fact, the auto focus on the Olympus OM-D E-M5 Mark ii in good light is just as fast, if not faster than a dSLR, which for such a small camera, I find mindblowing.
7. Face Recognition
Whilst we’re talking about auto-focus, I should mention that the Face Recognition on the Olympus OM-D E-M5 Mark ii is excellent.

The focal point selection using the thumbpad is simple and intuitive (you don’t need to press the Up button to engage it – an annoyance of the Fuji X100S), but with Facial Recognition engaged, you don’t even need to touch the thumbpad – focus switches automatically to the subject’s face when you press the shutter button.
This makes it even easier to capture the subject’s face (unnoticed) during street photography. 
On small cameras, the fewer the number of button presses needed to take the photo, the better, and with helpful functions like Face Recognition on the Olympus OM-D E-M5 Mark ii, taking a photograph of a person is made so simple.
8. Speed
By this I mean, the number of photos the Olympus OM-D E-M5 Mark ii can take in a row in one second.
With silent shutter engaged, being able to shoot off a machine gun-like 10 frames per second without anyone knowing is a lot of fun!
Whilst spray and pray isn’t the aim here, the continuous auto-focus (the camera’s ability to focus continuously on a subject moving towards or away from you) on most mirrorless cameras is still leagues behind dSLRs. That’s one reason why being able to shoot off multiple frames vastly increases the chance of you getting the shot you want.
It’s also useful for shooting large groups of people, where inevitably someone will be blinking. With multiple frames per second, you will vastly increase the likelihood of getting one photo where everyone has their eyes open.
9. Stabilisation – Photos
The 5 axis stabilisation on the Olympus OM-D E-M5 Mark ii is truly remarkable, allowing you to handhold photos much slower than the reciprocal rule (the reciprocal rule means for example, if you’re using a 50mm lens, setting your shutter speed to any slower than 1/50 will most likely result in a blurry photo if you are hand holding the camera.)
In practice, what this means is that you’ve a way better chance of being able to take an unblurry shot in low light without using a tripod.
It’s the kind of feature that when you return to your trusty dSLR, you’ll wish it had the same thing built in.
Here’s a hand held shot at 1/15th second, which would be impossible with a dSLR:
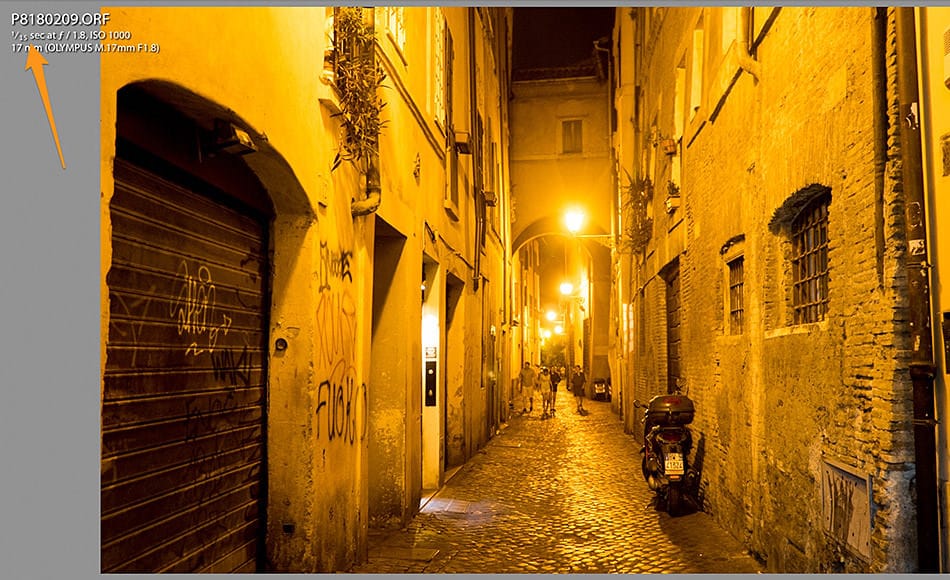
The photo stabilisation worked flawlessly for me, and I found it rather entertaining that whenever it was engaged, you could hear a tiny motor whirring inside the camera.
10. Stabilisation – Movies
Where the stabilisation really comes into its own is during the movie feature. It’s like having a built in steadicam, allowing you to produce movies with gliding movements rather than the usual jarring/bobbing recording typical of such a small cameras.
Looking at the LCD screen whilst recording and walking along is mind blowing – every step you take is muffled into a smooth motion right before your eyes, making you feel like you’re gliding.
Although I rarely ever shoot video on holidays, the stabilisation function on the Olympus OM-D E-M5 Mark ii made it so much fun (and the output so professional looking), that I found myself hitting the record button between shooting stills more and more often.
I’ll upload a movie to demonstrate this feature soon…
11. Live Exposure
This feature makes long exposure photography much, much easier and whole lot of fun too. Olympus refers to it as Live Time.
In a nutshell, Live Time allows you to see the exposure as the camera is creating it.
What this means in practice is that rather than simply guessing (or calculating) the exposure length required for a low light photo, you can start the exposure (i.e. press the shutter button), then watch on the LCD screen as the photo gradually changes, until the point where you feel happy with how it looks, at which point you can press the shutter button again to take the picture.
It really brings out the magic of photography and will no doubt remind photographers who use film of being in a dark room, watching their pictures come to life.

The Ponte Vecchio in Florence | 11 Second exposure @ f/8, ISO 200
It’s a bit like watching a Polaroid become a colour photograph in front of your eyes, except that you’re the one controlling how ‘bright’ the colours are – it’s a lot of fun!!
‘Bulb’ exposure on dSLRs allows you to choose the length of an exposure on the fly, but of course, during the exposure, you’re unable to see how it looks, so it still involves a lot of guesswork.
Using Live Time, long exposure photography techniques like Light Painting and Star Trails are made much easier, giving you a new level of precise visual control that’s simply not possible with dSLR cameras.
12. Megapixel Boost
This is a bit of a gimmick, but being able to take an 40 megapixel photo using a 16 megapixel compact camera is very cool in the right situation.
To be able to create a photo with so much data, the Olympus OM-D E-M5 Mark ii needs to stitch together a few photos, which means that the subject needs to be completely static for the length of the exposure. This means you’ll mostly be using it for landscape work on a very still day.
I’ll be honest – out of 5,000+ exposures, I only used this feature once, but I’m glad I did. It means that I can make a large print of the below shot of Athens for my wall and be able to see incredible detail.

The size of this photo is 7296 x 4864, compared to 4608 x 3072 of the regular files.
Zooming in on the original image (especially on a Retina iMac!) is mind blowing. This screen shot doesn’t do it justice, but you get the idea.
![]()
13. Manual Focus
For those rare times when the Olympus OM-D E-M5 Mark ii struggles to achieve focus (usually in the dark), it’s great to be able to fall back on a manual focus system that’s executed in the best way I’ve ever seen on a camera.
If the camera starts struggling to focus, I’ll half press the shutter to disengage autofocus, then twist the ring on the Olympus 17mm f/1.8 lens I’m using. Immediately, Focus Peaking engages (and optionally a 100% zoomed image), that helps me be absolutely sure my subject is in focus.
For those of you who don’t know what Focus Peaking is, when you start to twist the focus ring on your lens, bright white lines start appearing around the edges of anything in focus. Keep turning the ring and the lines will move to other areas that are in focus, and when the lines appear around the thing you want to be in focus, press the shutter button completely and you’ve just got a shot in perfect focus.
Many compact cameras offer Focus Peaking as a feature, but the Olympus OM-D E-M5 Mark ii allows you to engage it faster and easier than anything else I’ve used.
When shooting wide open at f/1.8, I’d occasionally use manual focus to make sure I had my son’s eye in focus, or in the photo below, his eye lashes. Yes, it really is that accurate.

14. Dials
I love how the dials and shutter button placement on the Olympus OM-D E-M5 Mark ii mimic all Nikon dSLRs I’ve ever used.
On top of the camera, you have one two dials (wheels) – one controllable with your forefinger, the other with your thumb.
I set the front one to aperture and the rear to exposure compensation, since I shoot in Aperture Priority.
Using the LCD screen, it makes getting the exposure I want very easy – if the picture looks too dark, I roll the rear dial one way, too light the other way.
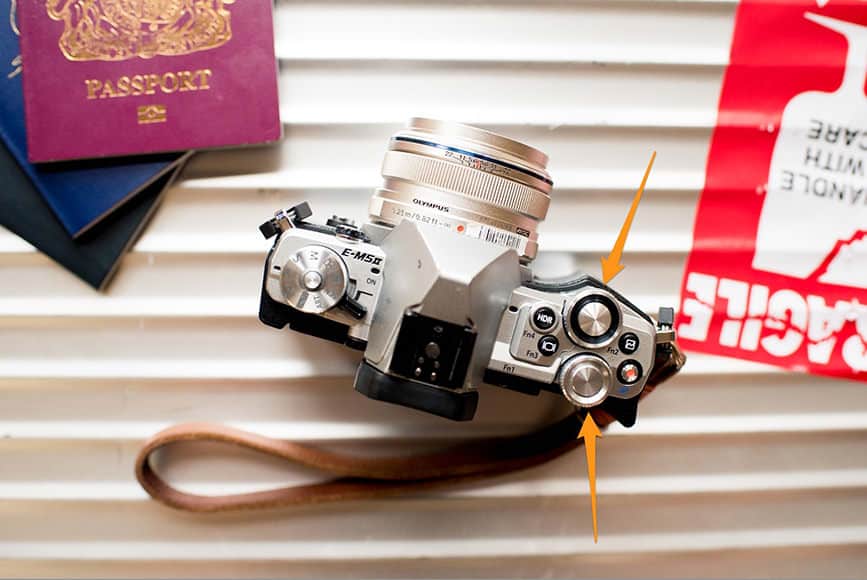
Even though this camera is small and the dials are very close to each other, the placement feels perfect and I can adjust both of them without moving my hand.
Even if you’re a Canon shooter, or more used to dials being placed elsewhere, the layout of the main dials/buttons on the Olympus OM-D E-M5 Mark ii is excellent and you’ll feel like you’re using a larger, professional camera body.
15. Grip
I’ve got big hands (24cm span). The grip on the Nikon Df for example is too small for me. My choice of Nikon over Canon initially was due to ergonomics alone. In short, how a camera feels in the hand is very important to me.
I can only fit 3 fingers and a thumb on the Olympus OM-D E-M5 Mark ii, which would normally rule it out, but due to one small addition, I feel comfortable using this camera and 100% confident that it will never slip out of my hand.
Perched at the top of the Olympus is a curved rubber thumb grip which protrudes out of the camera just enough to provide the perfect ‘ledge’ to support your thumb.
Coupled with a ridge on the front of the camera, I find it very comfortable and secure.

If you have gorilla sized hands, or you find it more comfortable to be able to rest all your fingers on the camera, there’s also an external screw-on grip available here which also includes an external mic input for video.
16. Looks
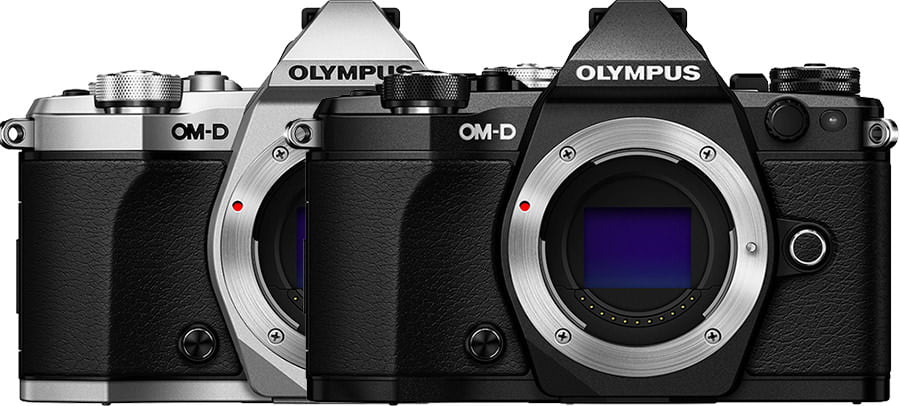
I think the Olympus OM-D E-M5 Mark ii looks great. I prefer the look of my Fujifilm X100s, but that’s at the detriment to its ergonomic functionality.
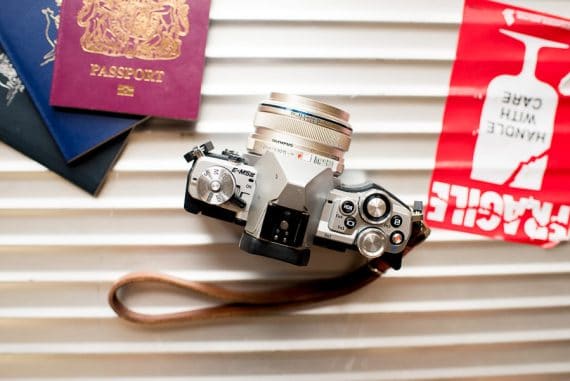
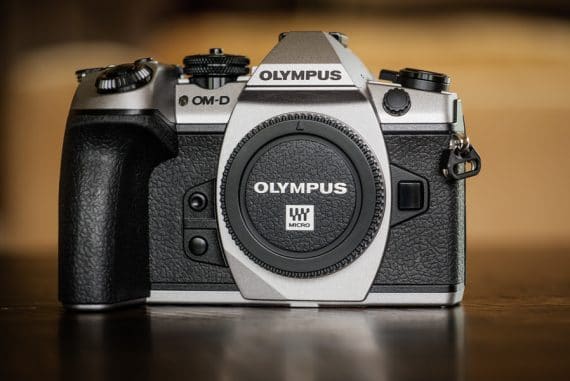
My preference is the Silver/Black body of the Olympus OM-D E-M5 Mark ii, and the black version of the Olympus M.Zuiko 17mm f/1.8 – available here.
Olympus OM-D E-M5 Mark ii – What I didn’t like
Let’s face it. No camera is perfect. There are always going to be things we don’t like, and here’s the list of the things that pissed me off about the Olympus OM-D E-M5 Mark ii:
Menus
I’ve used the Olympus OM-D E-M5 Mark ii solidly for one month, shooting well over 5,000 exposures, but the menu still confuses the crap out of me.
Actually, I should say menuS, since there are several, all reachable by different buttons. It’s a bit of a joke really, and something Olympus should be working hard to sort out as their hardware is excellent.
Luckily, once you have your settings dialled in and saved, there’s not much need to go digging around in the menus each time. Also there’s the ability to save your settings, which proves invaluable if you need to reset the camera.
Auto ISO
I rely on auto ISO to save messing around with buttons when I should be capturing a moment. Auto ISO means that the camera will automatically adjust the ISO to ensure enough light is reaching the sensor, rather than slowing down your shutter.
Usually with an Auto ISO feature, the camera allows you to choose a minimum shutter speed, meaning that when the camera descends to that chosen shutter speed, it will start increasing the ISO to allow more light into your exposure.
However, with the Olympus OM-D E-M5 Mark ii, there’s no way to set this minimum shutter speed, meaning that instead of the Auto ISO increasing the ISO for you, it’ll drop the shutter speed first instead.
There is the excellent Image Stabilisation feature to help you achieve a sharp shot despite a slow shutter speed, but nevertheless, it’s a bit annoying when a camera of this quality which can comfortably shoot high ISOs should be favouring a higher ISO over a lower shutter speed.
There is apparently a workaround which involves setting a minimum flash sync speed, but I never got this to work.
Eye Sensor during Playback
Whilst viewing photos during playback, the EVF (viewfinder)’s sensor will activate if you hold your hand too close. What’s happening here is the viewfinder is optionally set up to detect your eye’s presence (i.e., when you want to look through the EVF rather than the LCD screen), but is actually just sensing any object that’s close, like your hand.
This means that whilst browsing my photos, I’d often set off the sensor by mistake, making the camera return to shooting mode.
This is a minor gripe, but nonetheless rather annoying and something I think could be fixed easily in a firmware update. All Olympus needs to do is deactivate the eye sensor during Playback.
Startup Time
As I’m predominantly a dSLR user, I’m used to a camera being ready to shoot the moment you switch it on. However, with MOST non dSLR cameras, this is not the case, in part, I assume, due to the fact that there are LCD screens to activate and other electronics.
The startup time on the Olympus OM-D E-M5 Mark ii is pretty slow, and can become annoying if you’re relying on it to get the shot.
My workaround was to keep the camera turned on constantly, and hold my thumb over the viewfinder sensor, thus deactivating the LCD and preserving battery life. When I wanted to take a pic, I’d just remove my thumb and snap snap, I’d be done.
External Buttons
In general, the button layout on the Olympus OM-D E-M5 Mark ii is fine. I’ve mentioned how I love the dials already, and the thumb pad for focus point selection is easy to use even with the camera to your eye.
What I don’t like is the fact that Olympus has chosen to devote prominent external buttons to what I consider to be useless features.
Useless feature #1 – HDR. Does anyone other than Trey Ratcliffe actually care about HDR anymore?! And even if you do, the iPhone shoots much nicer looking HDR than the Olympus, and can do it using a single exposure (rather than merging several, which is the proper way but means the subject needs to be completely static).
Useless feature #2 – Curves. Is there anyone out there who has ever chosen a curves adjustment before taking a photo?! I might be missing something, but why does this function even exist inside a camera? Curves should stay on your computer, not in your camera!
I should mention that these buttons can be remapped, but this involves digging into the convoluted menu, so I couldn’t be bothered.
Come on Olympus – make at least one of those buttons ISO and you’ll make a lot of pros happy! Or put an ISO button on the back of the camera, and remove those superfluous buttons altogether. Simple is better on small cameras after all.
Continuous Autofocus
It works… sometimes. This is an area most mirrorless cameras that use only Contract Detection struggle, so the Olympus OM-D E-M5 Mark ii isn’t the only one.
In simple terms, if a subject is moving fast towards the camera and you try and fire off 10 consecutive shots with the shutter button held down, the Continuous Auto Focus would be lucky to get 5 in focus, even in good light. This is where the Contrast + Phase Detection AF of a dSLR will always win.
I never shoot in Continuous AF though, so this wasn’t an issue for me, but it needs to be mentioned just so you know the limitations of the Auto-Focus on many mirrorless cameras.
Confusing Features
I’ll admit it – even after a month of playing, I couldn’t figure out how to use the Panorama function, nor set up the movie function so it did what I wanted it to. I didn’t understand a lot of the user manual either, but I never was very good with manuals!
Conclusion & Final Recommendations
Despite these small niggles, all in all, I love the Olympus OM-D E-M5 Mark ii and think you will too.
In my opinion, the Olympus OM-D E-M5 Mark ii is the best travel camera and best street photography available today.
If you’re a parent looking to buy a camera to take photos of your kids and want all the quality of a dSLR without the bulk, look no further – the Olympus OM-D E-M5 Mark ii is the camera for you.
If you’re a working pro like me and you want a smaller camera which has excellent image quality to ‘chuck in the bag’, this is it.

Take my advice and buy the Olympus 17mm f/1.8 with it, or get one of the excellent zooms if you’re feeling too lazy to zoom with your feet!
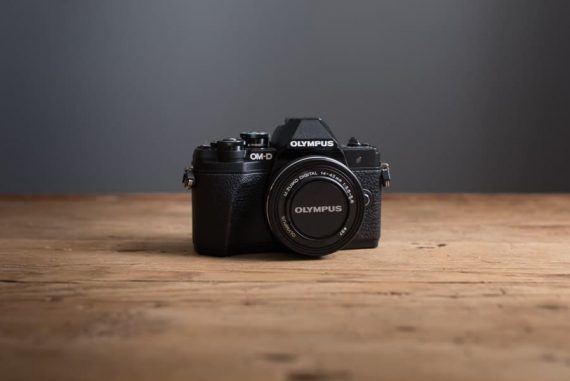
If your budget can’t stretch to the Olympus OM-D E-M5 Mark ii, I recommend you get its smaller brother, the Olympus OM-D EM-10 Mark II which has just been released. It has all the Olympus OM-D E-M5 Mark ii’s best features, all packed into a smaller body.
One final recommendation, buy a wrist strap such as this or this. Having a camera dangling around my neck annoys me and makes me look like a tourist, which is why I much prefer a wrist strap with a camera of this size.
Also, you do not need a camera bag! The whole point of having a small camera is that it’s there, ready to shoot at a second’s notice. Fumble around with velcro and clips and the moment’s gone. Trust me on this one!
One last option is to go with this Spider Holster, which, if you wear a belt and tuck your shirt into your trousers, is probably the best carrying system ever invented.
If you’ve read this far, thank you so much! I hope you enjoyed the review and the pics from my hols. Please leave a comment if you have any opinions about this camera, micro 4/3 cameras or anything you like :-)


