How to Invert Camera on iPhone (Mirror The Front Camera)
Learn the step-by-step guide to invert your iPhone camera and correct the mirror image for accurate selfie photo representation.
iPhone Photography | Learn | By Jeff Collier
Table of Contents
How to Invert Your iPhone Camera Back to What You See (Mirror Effect)
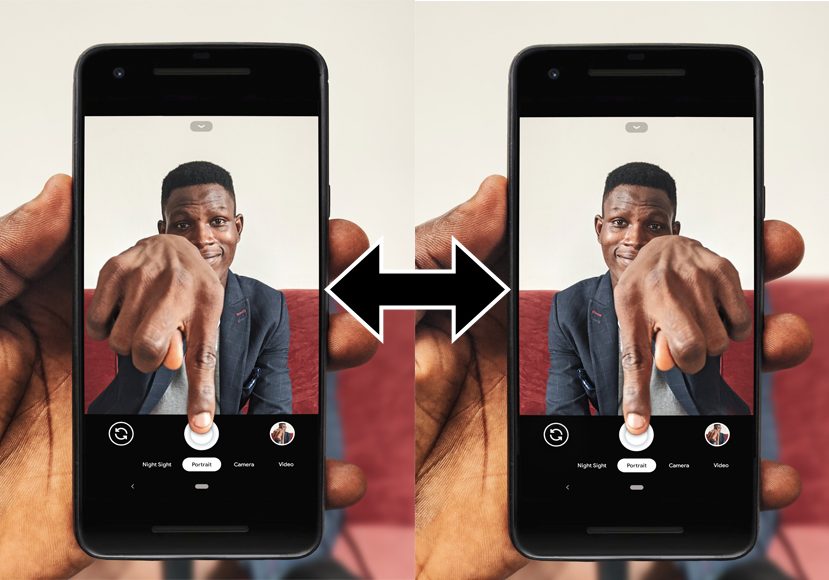
If you haven’t noticed, iPhones invert selfies by mirroring the view you capture with your front camera. For many selfie fans, this feature can make photos look odd.
That’s especially true if they’re used to the photos taken by other apps, such as Instagram or Snapchat.
Mainly, inverted selfies feel weird because our faces aren’t symmetrical. As a result, some prefer to keep the original shot they captured rather than the mirrored selfie. On the other hand, other people are completely fine with it and don’t even consider it that big of a deal.
If that issue annoys you like it does with others, check out how to fix it.
Step 1
Go to Settings app and scroll down till you see the famous icon of the Camera app.
Step 2
Press that icon and navigate to the section under the name “Composition.”
Step 3
Toggle on the switch next to the option Mirror Front Camera. Once you enable it, your taken selfies via the Camera app should be saved in the same direction you capture them.
How to Invert Selfies on Older iPhones
Apple has enabled the previously mentioned quick fix during their iOS 14 update. However, such an update is only available for specific iPhone models.
Therefore, you can find the option for mirroring the front-facing camera on iPhones that can update to iOS 14, including:
- iPhone 6S (and iPhone 6s Plus)
- iPhone 7 (and iPhone 7 Plus)
- iPhone 8 (and iPhone 8 Plus)
- iPhone X (and iPhone XR)
- iPhone (and iPhone XS Max)
- iPhone SE (second and third generations)
- iPhone 11 and all the later models
That said, if you have an older iPhone model, don’t give up just yet. There’s still a way to get the perfect selfie with the front camera, but manually. You just need to take your shot as usual and follow these steps after:
Step 1
Open the iPhone’s photo library and navigate to the already saved image you want to adjust.
Step 2
Tap the photo to open it and press Edit at the upper right corner of the screen.
Step 3
After your photo enters the editing mode, press the crop icon at the bottom of the screen.
Step 4
Tap the mirror icon that looks like two opposing triangles at the upper left corner of your iPhone’s screen (this should flip your photo vertically to your desired position).
Step 5
Press Done after you finish editing, and the new flipped version of the photo should be saved in the place of the old one.

Check out these 8 essential tools to help you succeed as a professional photographer.
Includes limited-time discounts.


