


Best Camera Settings for Portrait Photography
Discover how to dial in the correct camera settings for portraits to ensure your subjects are in sharp focus and backgrounds are beautifully creamy.
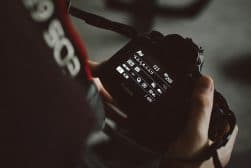
Learn | By Jeff Collier
This guide to portrait photography will walk you through all the different camera settings and how to optimize them for the best results.
Capturing stunning portrait photos is an essential skill for all types of photographers, as it’s the ideal way to highlight your subject or scene in focus and capture their beauty and essence.
However, getting professional-looking portraits can be quite challenging, as there’s a wide range of fundamental settings and modes that you need to adjust to get the image right.
While beginner photographers find it hard to navigate through these settings, they’re quite simple, and that’s where this helpful guide comes in handy!
Make sure you’ve already read our other portrait photography tips to get the most out of these tips.
Table of Contents
A Quick Summary of the Best Portrait Photography Settings
Credit: Luis Quintero
- Aperture: f/1.8 to f/4 depending on lens length
- Shutter Speed: Start with 1/100 to 1/125 and adjust accordingly
- ISO: 100 in natural light and increase only if necessary
- Camera Mode: Manual Mode (M) or Aperture Priority Mode (A/Av)
- Focus Mode: Autofocus Mode (AF-C) Continuous or AI Servo
- White Balance: Preferably AWB for realism
- Metering Mode: Most center-weight mode
- Drive Mode: Preferably Single Shot
- File Format: RAW Format
The Ideal Camera Settings for Portrait Photography
While several factors can affect the quality of your portrait shots, choosing the perfect camera settings is among the most impactful.
Understanding each one of these portrait photography settings and what they do is the key to optimizing your shots and capturing them like a pro.
You should also consider using the best camera for portrait photography.
Here’s a quick look at those initial settings for perfect portraits:
1. Aperture
Let’s start with one of the most fundamental camera settings when it comes to portrait photography.
Simply put, the aperture setting affects the exposure, level of background blur in your shots, and even the sharpness of your portraits.
You’ll typically find the aperture dial at the top right corner of the camera. Since it’s quite critical, here’s what you should know about it.
As the name suggests, the aperture is the tiny opening of the camera lens. The size of that opening determines how much light passes through and reaches the camera sensor.
Credit: Clark-cruz f/1.4 (left) / Teddy Tavan f/5.6 (right)
Difference Between Narrow and Wide Aperture for Portrait
One of the critical properties of aperture is that it controls what portions of your scene are in focus, which is known as depth of field.
This size of the aperture is commonly known as the “F stop value”, which is typically written as “F/” followed by a number.
The larger the number, the smaller the aperture. For example, f/2.8 is considered a wide aperture while f/16 is considered a narrow aperture.
With wider apertures, you get a shallow depth of field. In other words, you’ll have a certain plane in focus while leaving everything in the background blurred out.
This is perfect for portrait photography, as it allows you to artistically highlight your portrait subject, producing a more professional-looking photo.
The Problem with Ultrawide Apertures
Since wider apertures will heavily focus on one plane, it doesn’t only blur the background, but also parts of the foreground.
In other words, ultrawide apertures can blur out certain parts of your photo subject if they exist on multiple planes.
How Much Do You REALLY Know About Photography?! 🤔
Test your photography knowledge with this quick quiz!
See how much you really know about photography...

This problem is common when using ultra-wide apertures like f/1.4, especially with longer lenses that also provide a blurring effect.
To avoid this, start with a slightly higher F stop value, such as f/1.8 to f/2.8, and up to f/4 if you’re using a longer lens (around 85mm) to make up for lens compression issues – 85mm is considered one of the best focal lengths for portrait photography.
At such an aperture, you’ll still get enough focus on your subject for professional-looking results without worrying about any blurring issues.
You can also consider using one of the best lenses for portrait photography.
Pro Tip: While taking a portrait photograph of a large group of people or capturing the entire body, you should typically reduce your aperture a bit (between f/4 and f/8), to make sure none of the subjects of the photo is blurred out.
2. Shutter Speed
This one is a fairly simple setting but it has a huge impact on the quality of your photos, especially when it comes to exposure.
Shutter speed defines the amount of time that the camera’s shutter stays open, exposing the sensor to light. As a result, shutter speed is measured in seconds or a fraction of one.
For instance, you can find a shutter speed as slow as 2 seconds or as fast as 1/1000 of a second.

Credit: Pixabay. Shutter speed 1/125
Choosing the Right Shutter Speed for Portrait Shots
Optimizing the shutter speed in portrait photography is essential to control shakiness and freezing motion.
In other words, with faster shutter speeds, your subject will remain as sharp as possible while capturing the photo.
On the other hand, slow shutter speeds mean more exposure to light, which is essential during low-light situations and indoor photography.
For that reason, choosing the ideal shutter speed for portrait photos requires a balance between exposure and sharpness. So here’s a simple guide to navigate this issue:
As a general rule, you should always use the fastest shutter speed that keeps your photo properly exposed.
A good starting point here would be around 1/100 or 1/125, and adjust to a higher or lower speed as necessary. However, portrait photographers should keep the following points in mind:
- If you’re capturing a still or slow-moving subject, 1/100 should be enough to keep it sharp
- If you’re capturing a candid portrait photo of a freely moving subject, you should increase the shutter speed to 1/250 or 1/500. This also works for children and pets, as they’re more active and harder to maintain in a portrait pose.
- Instead of using the minimum shutter speed setting to increase exposure while shooting portraits indoors, adjust exposure through other methods, such as ISO and improved lighting for portraits.
3. ISO

ISO 500. Credit: The Happiest Face =)
Similar to shutter speed, adjusting the ISO camera setting also has a major impact on the light exposure of the camera.
The ISO is a measure of how sensitive the camera sensor is to exposed light, and it’s controlled electronically in digital cameras rather than mechanically.
Luckily, unlike aperture and shutter speed, the ISO photo setting is quite straightforward. Higher ISO will make your images brighter while lower ISO will make your images darker.
However, the main catch here is that higher ISO can also introduce static noise, which makes the images look washed and grainy.
How to Choose the Ideal ISO for Portraits
For portrait photography where details are essential, you should always start with as low ISO as possible and only increase it when necessary with no other options.
The right ISO setting for portrait photography depends on the lighting conditions. In bright light and sunny weather, you should keep the ISO at 100.
Yet, if you’re shooting at relatively limited exposure and you can’t use artificial lights, you’ll need to raise your ISO setting to around 400 or 800. At such a level, the risks of noise building up are far lower than the benefits of improved exposure.
In other words, as long as your ISO settings don’t exceed 1000, there won’t be much image noise to worry about, especially if you’re using a decent camera.
4. Camera Mode
Most modern cameras nowadays come with a variety of camera modes. Each one of these modes controls various settings, allowing you to focus on photography and worry less about adjustments.
You’ll typically find those settings in the main camera dial, although some digital cameras might include them electronically by accessing the settings menu in the camera’s user interface.
There are plenty of camera modes out there, but the best options for portrait are the manual mode and aperture priority mode, so let’s have a brief overview of each one of them:
Manual Mode
As the name suggests, the manual mode, typically labeled as “M” on most camera dials, simply leaves all the adjustments to you.
With this mode, you’ll control the aperture, shutter speed, and ISO along with other settings. Of course, optimizing all these settings at once might feel a bit tricky, but you’ll quickly get the hang of it.
Luckily, the previous section should give you a brief understanding of how to adjust those settings.
One thing you should know here is that the manual mode is the preferred mode for all professional photographers because it allows them to get exactly the picture they’re looking for.
In other words, if you want to get far in photography or enjoy the maximum level of creative freedom, you should definitely try the manual mode at some point.
Aperture Priority Mode
Aperture priority mode, typically labeled as “A” or “Av” in most modern cameras, is a semi-automatic camera mode that also works perfectly well for portrait photography.
In this mode, you set the aperture and the camera will automatically choose the ideal shutter speed, ISO, and other settings to achieve the optimal exposure.
This is a great mode to use for portrait photography because it lets you pick the depth of field and how much of the image should be in focus, without worrying about the rest of the settings.
The convenience of this mode makes it perfect while shooting wildlife and other situations when you don’t have enough time to adjust all the settings for every shot.
It also doubles as a training wheel or transitional phase for beginner photographers who aren’t ready to go fully manual.
That being said, this mode isn’t only for beginners, as many professional photographers might utilize this mode to get a quick professional shot when the aperture is the only aspect that needs adjustment.
5. Focus Mode
Although focus is rarely an issue for most photographers, a poorly focused image can easily ruin all the other settings.
Most cameras nowadays have a reliable autofocus mode, so you don’t have to waste your time and effort to adjust the focus yourself, especially if you’re going to take multiple photos in a session.
That being said, many cameras will offer various autofocus modes, and each one of them has its own advantages, so here’s a quick look at the most reliable ones and how they work:
- Single Autofocus Mode (One Shot Autofocus)
The single autofocus mode adjusts the focus on the subjects once. This makes it ideal for capturing still subjects, such as pose photos and headshots.
The problem here is that this mode doesn’t readjust the focus if the subject moves, so it’s not ideal for capturing candid portraits or photos where the subject is moving around freely.
- Continuous Autofocus Mode
This one is a reactive autofocus mode that utilizes AI to readjust the focus on the subject, whether they remain still or move around, as long as they stay in the frame.
This mode has different names across different camera models, including “AI-Servo” in Canon cameras and AF-C Continuous Autofocus in Nikon and Sony.
As you can see, the choice between the two autofocus modes depends on the type of subject you’re capturing.
6. White Balance
Credit: Adrienn
The white balance is a fairly simple setting but it has a tremendous impact on the overall vibe and essence of your photos, whether it’s a portrait or any other type.
The reason why it’s called white balance is because it’s responsible for how the white colors appear white in images.
This is essential because different light sources have different color temperatures, which can affect the colors in your photos.
For example, if you shoot a photo indoors under fluorescent lighting, the image will have a faint bluish cast. On the other hand, if you shoot a photo during sunset outdoors, this cast will become yellowish.
In a nutshell, the white balance controls the temperature tone of the photo, which is why it’s measured in Kelvin.
As you can see, you can use such a property creatively to change the vibe of an image or give a dramatic effect. Since it’s a fairly easy setting, you should get the hang of it in minutes.
However, if you’re concerned about accuracy, you can simply leave that task to your camera by choosing the Auto White Balance (AWB) mode.
7. Metering Mode
The Metering mode is another camera setting that affects exposure, but it’s not as essential as aperture, ISO, and shutter speed.
This one works by determining how the camera measures the exposure for a shot, hence the name. Ideally, there are three main metering modes for photography, including:
- Matrix Metering: This is the default metering mode on most cameras. It divides the scene into multiple zones and measures the light in each one. The camera then uses this data to calculate the average exposure for the scene.
- Center-weighted Metering: This mode measures the light in the center of the frame and gives it more weight when calculating the exposure. This is the best mode to use for portrait photography because it ensures that the photo’s subject, which is usually at the center, is prioritized.
- Spot Metering: This mode measures light in a tiny area of the frame and gives it the most weight when calculating the exposure. This one can also be good for portrait photography when you want to make sure that a specific part of the subject (eyes, face, etc.) is properly exposed.
As you can see, each one of these modes has its perks, and while center-weighted metering is the most common option, you might need to switch to spot metering depending on your creative intent.
9. Drive Mode
It reduces the number of photos you have to sort through and edit. When you shoot in single-shot mode, you’re more likely to take only the best photos of your subject.
There are three main drive modes on most modern cameras.
- Single Shot: The camera takes one photo each time you press the shutter button. This makes it ideal for still photography and most portrait photography situations.
- Continuous Shooting: The camera takes multiple photos in rapid succession as you press and hold the shutter button.
- Self-Timer or Delay Shooting: The camera takes a photo after a set delay, so it has very few applications in portrait photography, except in the case of group photos and selfies.
The continuous mode is good for sports photography or other situations where you need to capture a lot of action. It’s also ideal if your subject changes pose a lot and you want to capture their best version.
However, The single shot is usually the best drive mode for portrait photography, and here are some of the reasons behind that:
- It gives you enough time to take each shot carefully
- It reduces the number of photos you have to sort through and edit. When you shoot in single-shot mode, you’re more likely to take only the best photos of your subject.
- It helps your subject/model stay relaxed during the session, as the rapid shutter can intimidate some people, which shows in pictures during post-processing.
10. Image File Format
There are two popular image formats to remember while shooting portraits: RAW and JPEG.
The main difference between the two is that JPEG is a compressed file with much smaller file sizes at the expense of limited adjustability.
Take the HARD Photography Quiz! 🤯
Now it's time to really test your photography knowledge!
(99% of people can't get all the questions right...)

On the other hand, RAW format is uncompressed and contains far more details than JPEG, which results in ultra-clear quality, higher resolution, and, best of all, unlimited adjustability.
Of course, the choice here is pretty obvious once you consider your intentions. Simply put, if you plan to post-process and edit the photos in platforms like Adobe Photoshop or Lightroom, you should go for RAW files.
However, switching to JPEG would make things a lot easier and more convenient if you’re doing little to no modifications to the photos after capturing them.
Extra Tips to Improve Your Portrait Photos

Credit: Vinicius Wiesehofer
Now that you have a deeper understanding of the camera settings for portrait mode, here are some helpful tips to help you take your portrait photos to the next level!
Use the Right Lens for the Job
Besides your camera settings, you should also choose the ideal lens for portrait photography, which depends on what you’re capturing and how you want it to look.
Ideally, you should opt for a relatively short telephoto lens, preferably at a range of around 35 to 85 mm.
However, if you’re taking full-body portraits or group photos, you might want to opt for a slightly longer lens at around 100 to 150 mm.
The advantage of opting for telephoto lenses is that they compress the perspective and naturally create a focused subject/blurred background effect without dimensional distortion, unlike wide-angle lenses, which distort the subject of the photo at a close distance.
Keep the Background in Check
A cluttered or distracting background can take away from the focus of your portrait. For that reason, you need to choose a background that would complement your subject but doesn’t compete with them.
A good way to tune down distractions in portrait mode is to go for a slightly narrower aperture or enhance the blurriness of the background during post-processing.
Lighting Conditions Are Equally Critical
As previously established, increasing the camera’s exposure is not always a practical solution, as it comes with throwing the balance of other adjustments.
Of course, natural light is usually the best for portraits, but in situations when it’s not achievable, you should work on enhancing exposure manually through artificial lighting and reflectors.
Experiment with Different Settings
One of the main reasons you’re reading this guide is that you want to optimize the camera yourself rather than relying on the automatic modes.
As such, don’t be afraid to experiment with different camera settings, such as aperture, shutter speed, and ISO, to achieve the desired look for your portraits.
Use External Help for Stabilization
Like light exposure, adjusting the shutter speed to improve shakiness can create other issues.
If you’re shooting in low light or you have to use a slow shutter speed, a tripod or other stabilization device can be a valuable asset to your work and prevent blurry photos.

Check out these 8 essential tools to help you succeed as a professional photographer.
Includes limited-time discounts.


Jeff Collier is an experienced film photographer who enjoys experimenting with modern digital photography equipment, software and apps. He’s also an ex-world champion triathlete and avid cyclist, clocking hundreds of km each week in the beautiful Tweed Valley of northern NSW, Australia.
WELCOME TO SHOTKIT
Enter your email to be sent
today's Welcome Gift:
19 Photography Tools
🔥 Popular NOW:


Shotkit may earn a commission on affiliate links. Learn more.