How To Mask In After Effects
Learning how to apply a mask in Adobe After Effects is an essential skill when creating animations, videos or visual effects. Here's how to do it properly.
After Effects | Software | By Ashley Darrow
Masking is an essential skill in video editing and creating motion graphics. Today, I’ll show you how to mask in After Effects.
Learning how to mask let me upgrade my videos from having basic, still graphics to having much more engaging visuals.
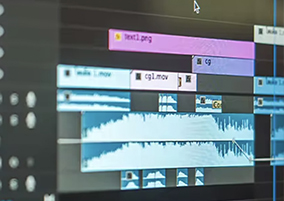
Download the latest version of Adobe After Effects to follow along with this simple tutorial.
Start a free 7-day trial today
Whether you’re masking text, shapes, or masking out sections of a video, this is the tutorial you need to improve your videography game.
Here’s everything you need to get started with masking in Adobe After Effects!
Table of Contents
How to Mask in After Effects
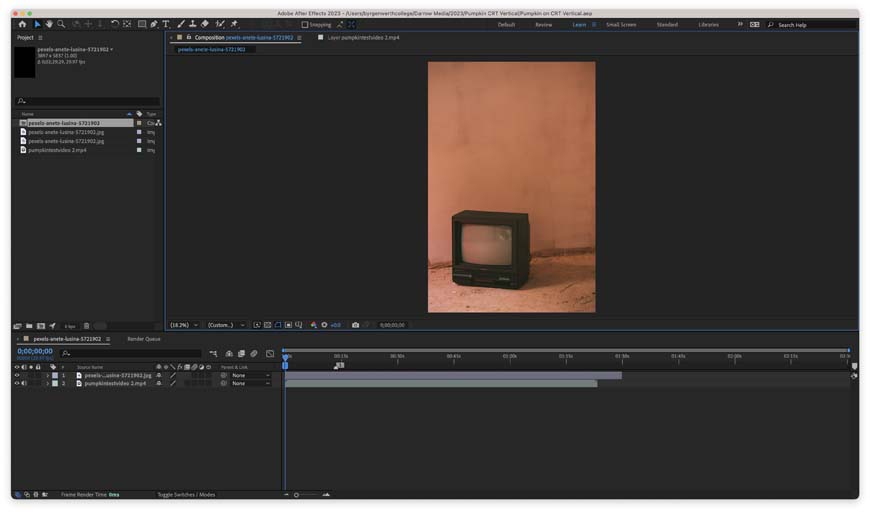
Keep your projects organized and your editing will always be that much easier!
I’m going to be working on a short, vertical video for social media. My goal is to simply mask out the screen of an old CRT television so that my footage looks like it’s playing inside of the TV.
I’ll start you out with the quickest, and easiest, way to create masks before showing you something a little more complicated—but much more powerful.
Import Your Assets
I’m leaving no stone unturned with this guide. The first thing you want to do is import all of your assets into your After Effects project.
In this case, I’m importing a still image of a CRT television in an empty room along with some video I shot earlier.
(In case you wanted to see some behind-the-scenes footage, I shot it during my review of the Lark Pro Max Lavalier microphone!)
- How to crop in After Effects
Select The Layer You Want to Mask
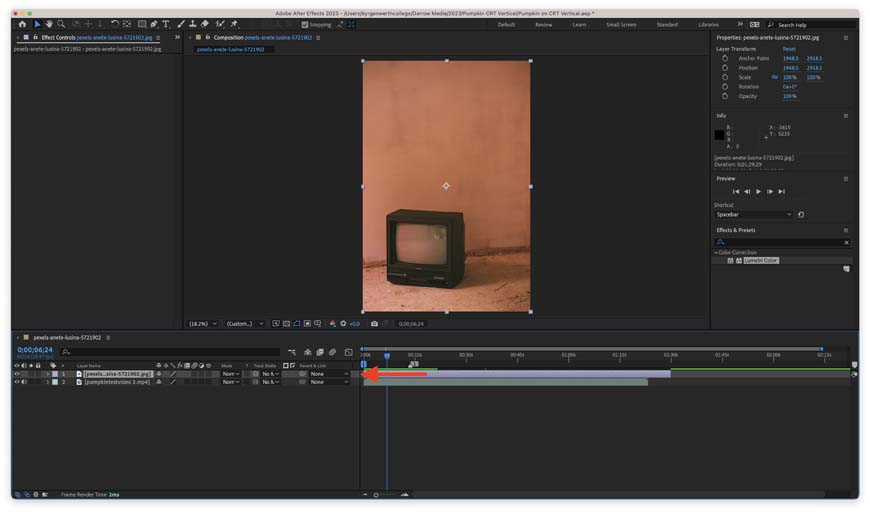
Just like Photoshop, you always want to make sure you’re working on the right layer!
The first thing you want to do is select the layer that you’ll be drawing the mask on. This is an incredibly important step.
If you have the wrong layer selected, you’ll wind up masking the wrong part of your video. If you don’t select any layers, they’ll draw a shape instead of creating a layer mask.
Grab The Pen Tool
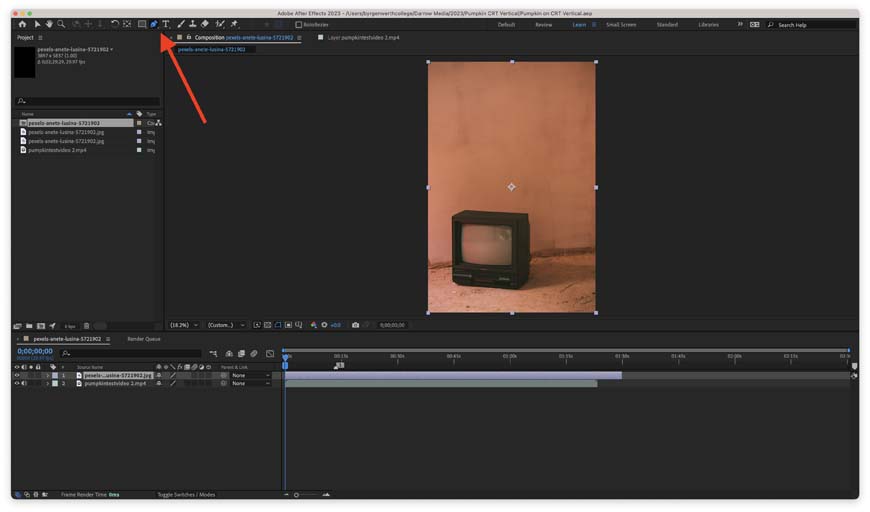
The pen is mightier than the sword, or in this case the razor tool.
The pen tool is going to be your best friend when it comes to creating a layer mask.
You’ll find the pen tool in the upper left hand corner of After Effects.
Draw Your Mask Path
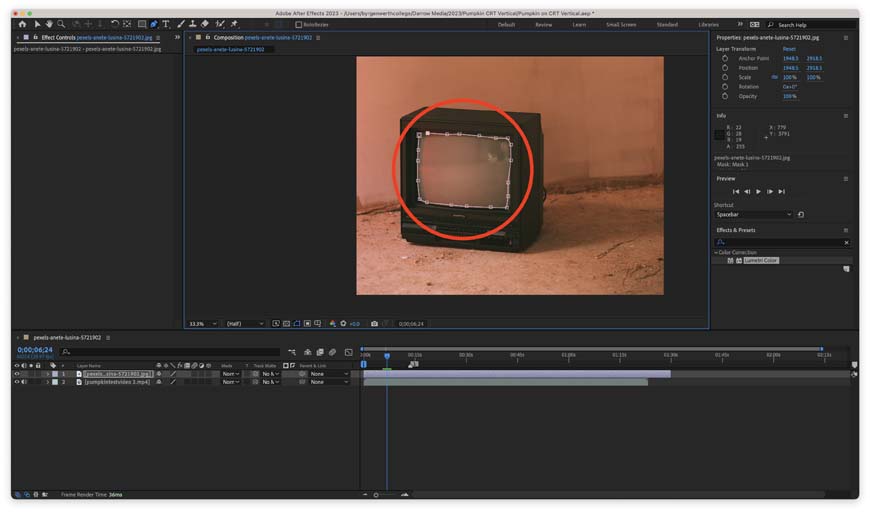
Time to put those basic shape-drawing skills to use!
Drawing your mask path is where things start to get a little bit more complicated.
You can tell that I rushed things a little bit for the sake of this tutorial, but you want to take as much time as you can when you draw your mask path.
The mask path will define the overall shape of the mask even after you do some adjusting to the mask path property settings.
The more precise your mask path drawing is, the cleaner your layer mask is going to look in the end. This becomes even more important when we start working with shape layer masks later in the tutorial.
Remember, you can always take a break if it gets a little tedious masking around complicated elements like plants or furniture.
Create Masks and Adjust Them
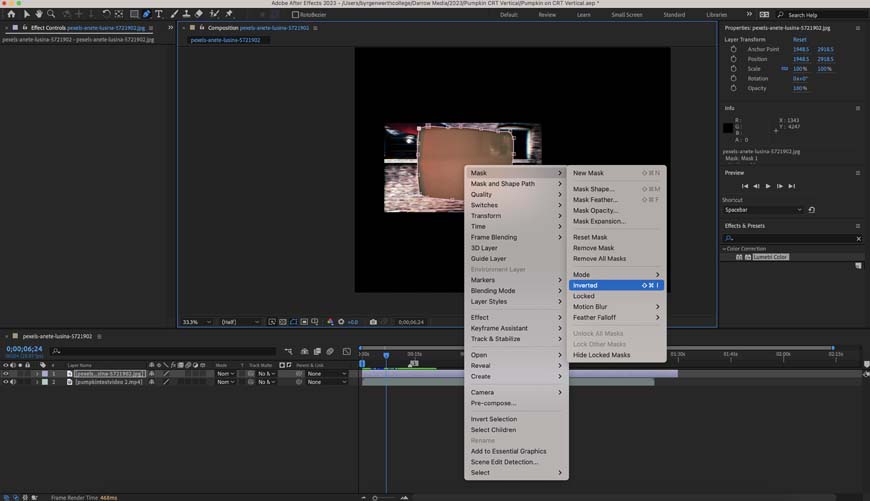
Don’t be disheartened if your mask looks a little weird when you first create it. By default, After Effects makes the area inside of the shape visible while masking out the area around the shape you just drew.
I tend to think of masking as drawing a little window through the layers of my project. If this is the goal you’re going for, all you need to do is right click on the mask layer, select mask, and then invert your mask.
This will make it look like you just drew a little window in the layers of your project rather than the other way around.
How to Create a Shape Layer Mask
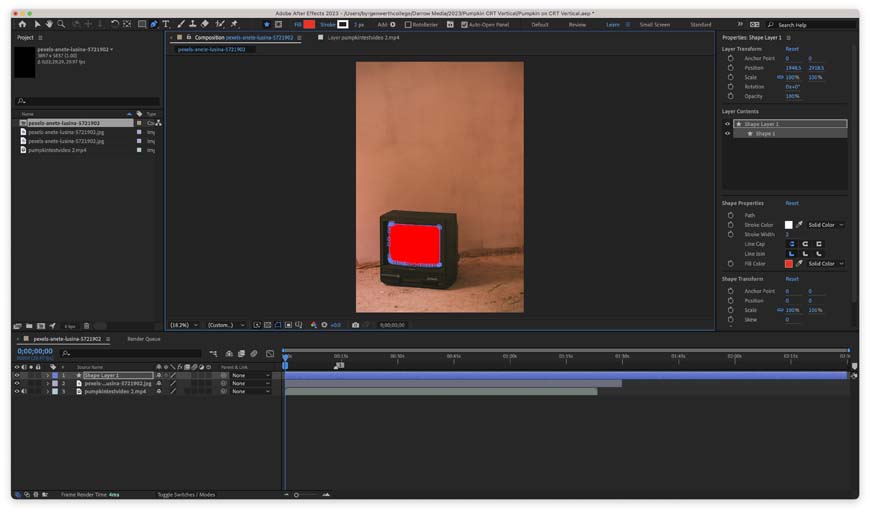
Now, I’m going to walk you through a more advanced way to create masks in After Effects by using the shape tool.
This has a few more steps to go through, but you wind up creating a mask that you have much more control over.
Deselect All Layers
The first thing you want to do is deselect all of your layers. You don’t want a single mask or shape layer selected before you start drawing.
We’re going to be creating a new shape rather than drawing a mask onto an existing layer.
Draw Your Shape
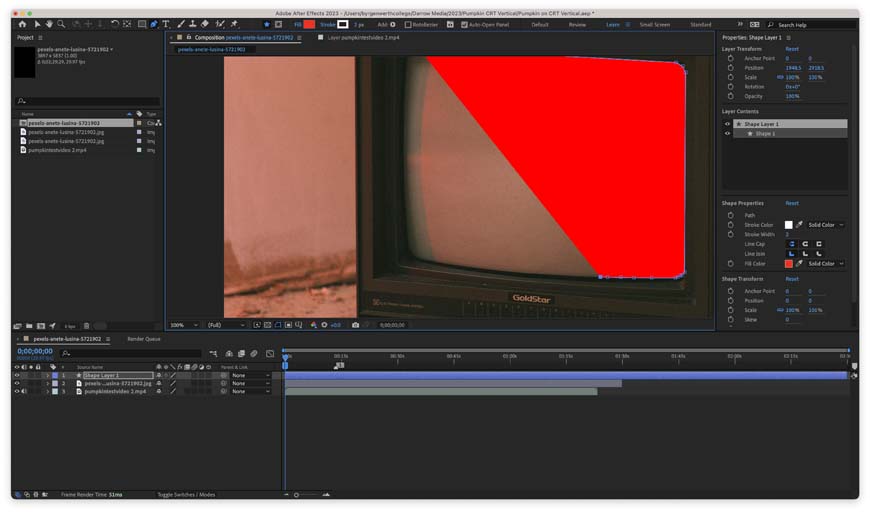
We’re back to drawing some fun shapes!
Start off by selecting the pen tool like normal. This time, with no layer selected, you’ll draw a brand new shape that gets its own layer.
You can also use the shape tool to create a new mask with a predefined shape. Shape tools are a huge time saver when you just want to make a quick rectangle shape layer rather than a freehand drawing.
Drawing the shape is exactly the same as I showed you in the first part of this tutorial. The goal is to draw a shape that matches the area you wish to mask out as close as possible.
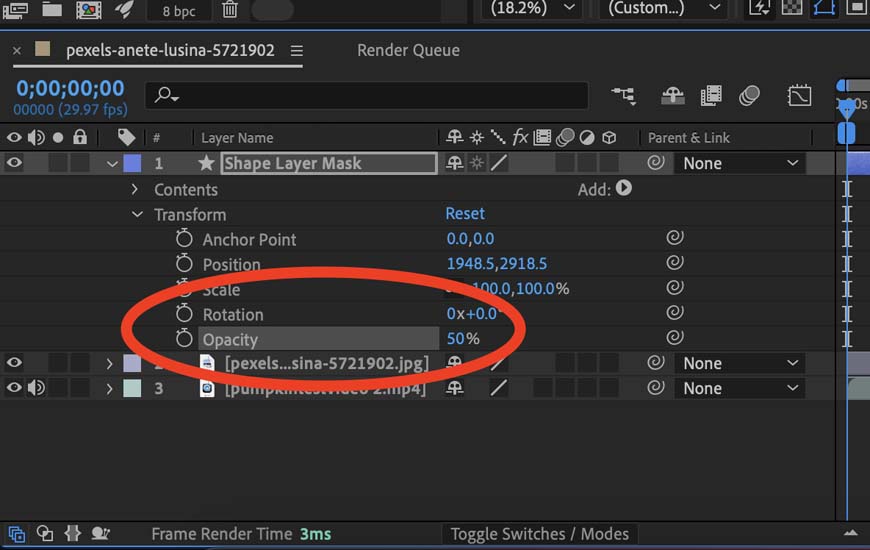
You might notice that it’s a little hard to draw a shape over an existing layer with any accuracy. You do need to see your mask layers and the layer beneath it to get the best results.
A quick hack I always do is to reduce my new shape to 50% transparency allowing me to see the layer beneath it as I continue to draw the shape.
Convert The Shape Layer into a Mask
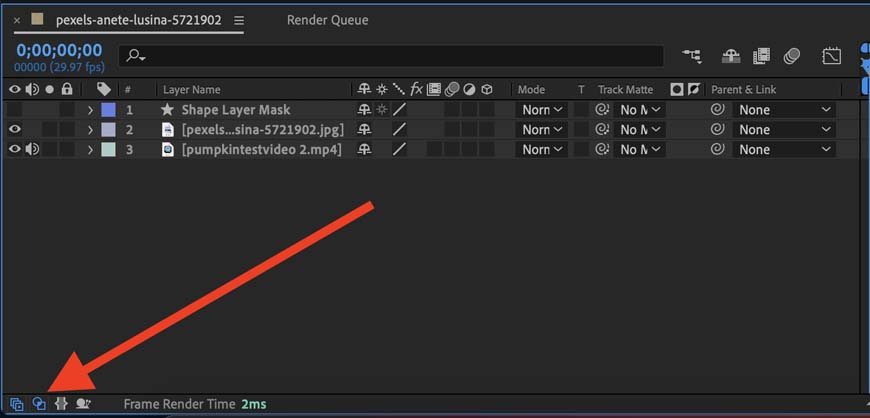
The transport controls can be toggled on and off with this button.
In order to convert the shape layer into a mask, you need to expand the menu options in the layers window.
You can click on this little icon in the lower left corner to expand the transfer controls allowing you to change a shape layer into a mask.
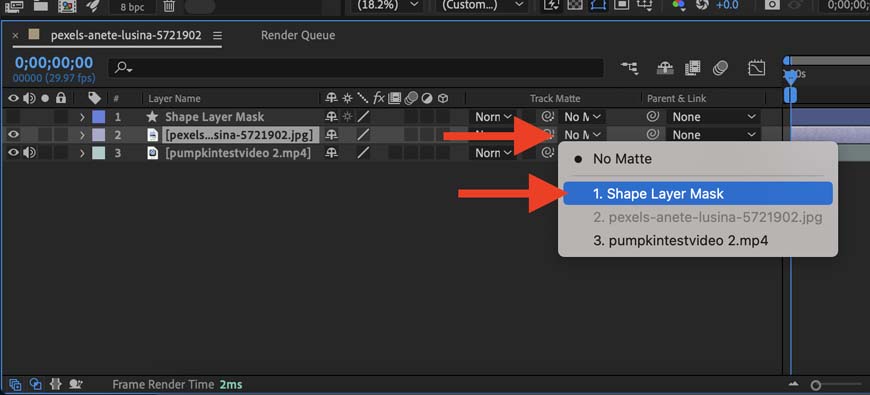
This is a vital step to creating a shape layer mask.
To turn a shape layer into a mask, all you need to do is expand the drop-down menu underneath Track Matte for the layer you wish to mask and select the layer you wish you turn into a mask.
In this case, I’m selecting my still image of a CRT TV and choosing my new shape layer as a mask.
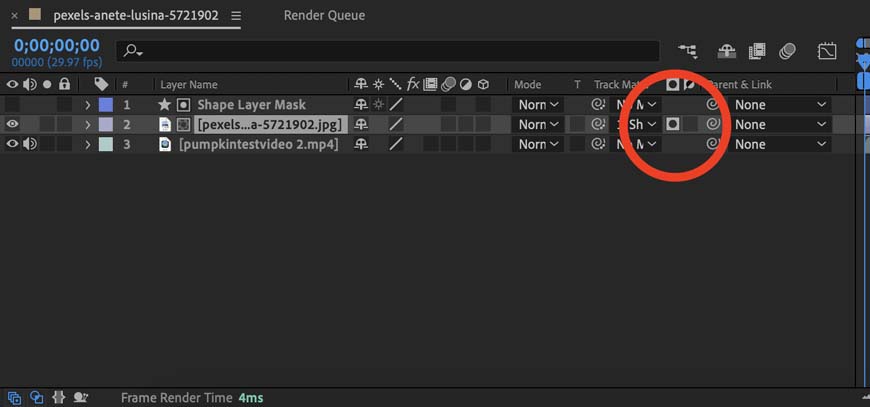
You can toggle this button to make sure you’re masking the right section of your videos.
You just turned your shape into a mask, but which option should you pick?
Select alpha matte to transform the shape you just drew into a mask or alpha inverted to transform the negative space around the shape into a mask. You can toggle them both with this button.
Adjust Your Shape Layer Mask & Fine Tune Your Video
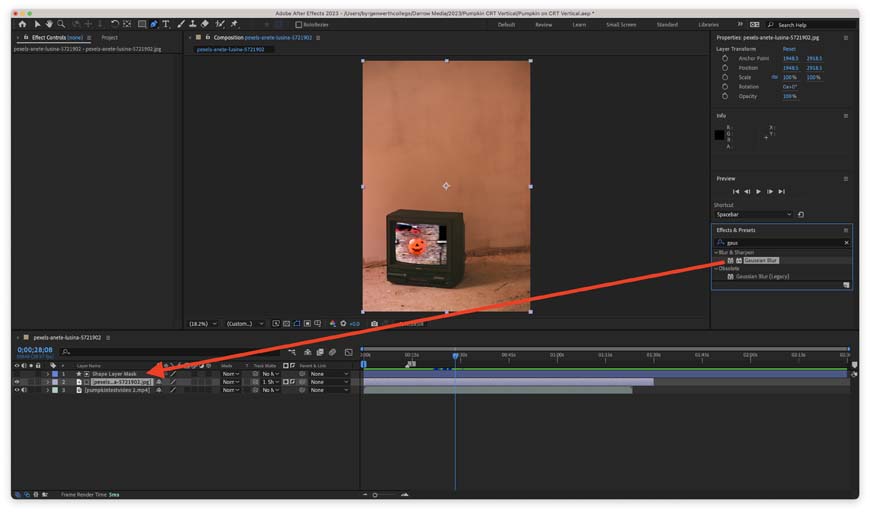
A mask feather makes your mask look more natural.
We’ve got a few more tricks up our sleeves to refine a shape layer mask.
The first thing that you can do is add a little feathering around the edges of your shape to make the mask feel a little more natural.
You can create a mask feather effect by opening up the effects menu and using the gaussian blur effect.
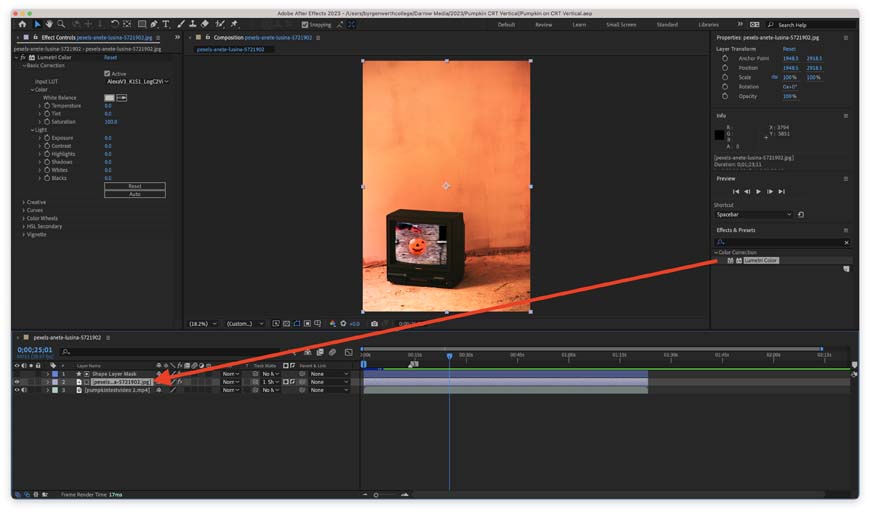
Remember to color correct your footage layers and not your shape layer.
The next thing that we should do is some basic color correcting to make sure that all of the layers in our project have a complimentary aesthetic.
In this example, I was able to make a few basic changes to increase the saturation and give it a more filmic look to match the style of the video that shows through the mask I just created.
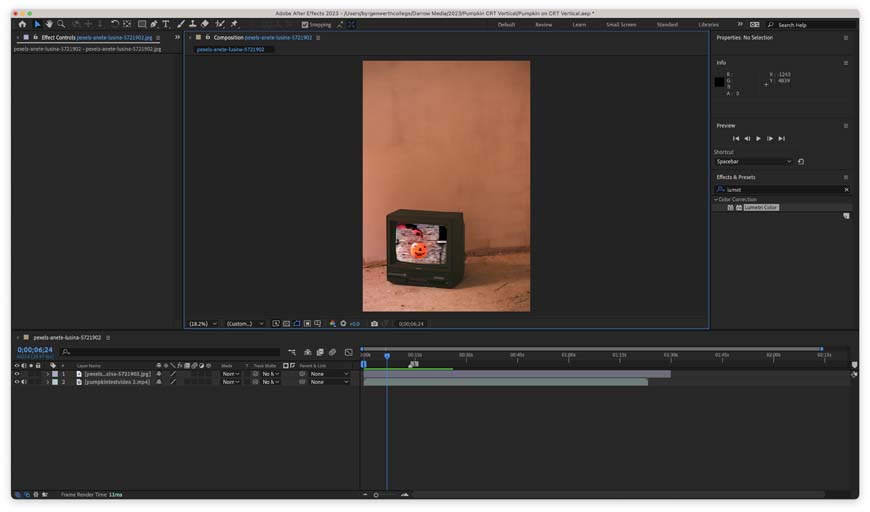
Congratulations! you just made your first mask in Adobe After Effects using a shape layer.
Take your time to play around with the color correction, feathering, and overall shape to get a great effect on your mask.
Can You Clip Mask in After Effects?
You can easily create a clip mask and After Effects.
The easiest way to create a clip mask is to create a new shape and add a track matte to that shape.
Play around with Alpha Matte and Alpha Inversion Matte to make sure that you have your clip mask set up properly.
You can use a clip mask to create complex motion graphics or just to better arrange the independent parts of your overall composition.
You can apply a track matte to shapes, text, or any layer.
Masking in After Effects — Conclusion
Masking is a simple effect that can have a dramatic impact on your composition.
Now that you’ve learned the basics of creating a mask in AE, you’re ready to build up your skills and create some advanced motion effects!
Got questions about masking or video effects? Ask away in the comments and I’ll answer your question in an upcoming article!
And if you’ve mastered the technique, how about learning how to mask in DaVinci Resolve.


