21 Fun Photoshop Ideas to Try Today
Stuck wondering what your next Photoshop project should be? Check out this article packed full of Photoshop ideas for a dose of inspiration.
Photoshop | Software | By Jeff Collier
Adobe Photoshop opens up millions of editing possibilities.
With it, you can create fantastical scenes and surreal landscapes that can transport viewers into entirely new worlds.
You can enhance the natural beauty of already beautiful subjects and breathe life into mundane objects.
But with so many creative options at the tip of your fingertips, where do you begin with your photo manipulation?
In this article, I’ll show you some fun Photoshop ideas to inspire your next masterpiece.
Table of Contents
21 Awesome Photoshop Ideas to Try Out
Whether you’re a seasoned Photoshop pro or tenuously dipping your toes in the world of editing and digital art, here are some of the coolest Photoshop ideas to try today:
Create Artful Images with the Double-Exposure Effect
The double-exposure effect is one of the easiest ways to add a touch of intrigue to your photos.
With this effect, you blend two or more images together to create a single composite image.
You’re essentially superimposing multiple images in a single frame, creating a unique and surreal edit.
Here’s how to create a double-exposure effect in Adobe Photoshop:
- Place the image you want to use as the base onto your canvas.
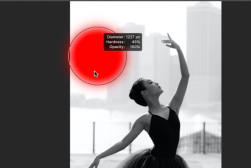
- Adjust the opacity of the base image and make it somewhat transparent. You can adjust the opacity in the Layers panel.
- Place the second image on top of the base image. Then, go to Layers and set the Blend mode to Screen.
- Reduce the opacity as you see fit and use layer masks and brushes to refine the effect.
Infuse Atmosphere and Mystery with the Smoke Effect
Want to create a sense of atmosphere and mystery in your images? Consider adding a captivating smoke effect in Adobe Photoshop.
This technique is often used in movie posters and classic photography to add a touch of surrealism to a work.
The easiest way to add a smoke effect in Photoshop is by utilizing brushes and filters. Here’s how:
- Open a new file in Photoshop and set the Background Contents to white.
- Using the Paint Bucket tool, turn the background black.
- Create a new layer for your smoke effect. This is where you’ll apply the brushes and filters to produce a smoky appearance.
- Choose the Brush Tool from the toolbox. Customize your brush settings to achieve the desired softness and subtlety.
- Apply the smoke brush onto the black background. As you do so, use varying brush sizes and opacities to create a realistic and organic smoke pattern.
- Once you’re happy with the brush strokes, apply filters to enhance the smoke effect. The best filters for this purpose are Gaussian Blur and Motion Blur.
- Adjust the opacity of the smoke layers and experiment with different blending modes to seamlessly integrate the smoke into your image. Finalize the edit by smoothing out the edges of the smoke.
Add a Retro Twist with the Glitch Effect
As the name suggests, this effect introduces digital distortions and glitches to your work. It adds a retro aesthetic that mirrors the visual appearance of old-school analog technology, throwing your viewers back to the era of VHS tapes and CRT monitors.
There are multiple ways to create a glitch effect in Adobe Photoshop, but by far the easiest is using Photoshop’s halftone filter. You can find this under Filter > Pixelate > Color Halftone and set it to the Line option.
Paint Drip Into Your Photos
This effect makes your photos look like they’ve been splashed or drenched in vibrant paint. It’s a great way to add dynamic motion to your visuals and tell a story.
- Open the image you want to add the effect on and duplicate it into a new layer. In the top layer, remove the subject you want to drip.
- Highlight the subject and convert it to a Smart Object. You can do this in Layer > Smart Objects > Convert to Smart Object. Once done, click Filter and find Liquify.
- Customize your brush to fit your artistic vision and create the dripping effect using the Forward Warp Tool. Drag the brush from top to bottom to simulate the appearance of paint dripping down.
iMessage Text Bubble
Have you ever wanted to convey a specific narrative in your photo but are unsure how to do it effectively? Adding iMessage text bubbles to your image can be a creative and simple solution to this dilemma.
You can do this by downloading an iMessage Bubble Photoshop asset pack or manually drawing the text bubbles yourself.
Use the Shape Tool or the Pen Tool to create rectangular or rounded rectangles for your text bubbles, then use the Type Tool to add text within.
Shrink Your Subject
Another fun Photoshop idea is to transform your subject into the size of an insect and put them in a macro scene. You can take inspiration from Joel Robison’s work, who specializes in whimsical photography.
YouTuber Rafy A. did an excellent step-by-step tutorial on the miniature style effect in Photoshop.
The process may appear complicated at first, but once you get down to the basics, you can create a miniature world that rivals “Honey, I Shrunk the Kids” and “Alice In Wonderland.”
Add a Touch of Vintage with the Ink Smudge Effect
The Ink Smudge Effect introduces a vintage-like aesthetic to your photos. With it, you can add ink smudges, stains, or splatters to give your images a weathered, antique, or watercolor painting-like appearance.
Here’s how to apply the effect:
- Adjust your brush settings according to the desired smudge effect. Then, add smudge strokes to your image.
- Experiment with blending modes and layer opacity to integrate the smudges with the base image.
- Blur out the edges and use the Transform tool (Ctrl/Cmd+T) to rotate, warp, and resize the smudges. You can also add texture to the smudge layer by adding texture overlays, grain effects, or noise filters.
Trap Your Subject in a Jar
Transform the ordinary into the extraordinary by “trapping” your subject in a transparent glass jar.
It’s a fairly simple project even beginners can create. All you need is a glass jar or fishbowl, a camera, and a bit of Photoshop skills.
You can add reflections and shadows on the subject post-production to simulate how the light interacts with the glass jar.
Levitate Yourself
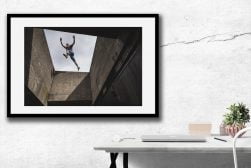
Defy gravity and levitate mid-air with a bit of Adobe Photoshop magic.
Strike a pose atop a chair and import the photos into Photoshop. Place the background image as the bottom layer and stack the photos you just took on top of it.
Then, carefully erase the supporting object from the levitation photos to make it appear as though you’re floating without any visible support.
Create soft shadows beneath yourself and adjust the brightness and color of each layer, and voila—you’ve created an awesome gravity-defying self-portrait!
Thanos Snap
If you’re a Marvel fan, you surely remember the iconic “Thanos snap” scene, where people disintegrate particle by particle before your very eyes. You can create that same effect in Photoshop using the dispersion effect.
Here’s how:
- Create three adjustment layers: an isolated subject, the original image, and a background layer.
- On the subject layer, use the Forward Warp tool to distort the area of the image you want to disperse. Gradually push and pull the pixels outward from the subject’s center to create the disintegration effect.
- Next, apply the Dispersion Filter to the subject layer. Adjust the filter’s intensity, direction, and density to your liking.
Set Stuff on Fire
Instead of lighting stuff on fire and putting yourself at risk, use Photoshop to add a fire effect to your photos safely.
The effect may appear difficult to pull off, but it’s only a matter of drawing the flame, adding a filter, and setting it ablaze.
You can adjust the flame’s characteristics in the Filter drop-down under Flame. Here’s how:
- Select the Brush tool and choose a red or orange color for your flame. Create a new layer to keep the flame separated from the background.
- With your frame layer selected, go to the Filter menu > Render > Flame. In the Flame dialog box, adjust the settings as you see fit. Apply the flame filter to your subject.
- Using the Transform tool, scale and position the flame as needed. You can fine-tune the flame’s appearance by adjusting the opacity and the layer blending mode.
- Beneath the flame, use a soft brush to add a subtle glow or reflection on nearby surfaces. Then, adjust the color balance and lighting so the flame’s color matches the lighting in the original photo.
Draw Realistic Clouds
Turn a cloudless scenery into a dreamy landscape by adding realistic clouds in Photoshop.
You can customize the clouds and make them as puffy, wispy, or stormy as you like.
You can also edit existing clouds and change their shape to fit your scenery.
The simplest way to add clouds in Adobe Photoshop is by using a preset cloud brush. You can find many free cloud brush packs online, so you don’t have to pay extra to edit your image.
Find a set of brushes that best fits your artistic vision, import the file to Photoshop, and start brushing on your clouds.
Some brushes involve dragging and clicking the cursor to create brush strokes, while others apply by clicking one for an instant cloud effect.
Falling Leaves
Cherry blossom petals gently cascade in a springtime garden. Orange leaves fall in a serene autumn forest. Children jump into a pile of green leaves.
There are countless ways to add a touch of whimsy to your photos, by adding falling leaves into the composition.
To make it all the more realistic, blur out the falling leaves according to the depth of field.
Turn Your Pet Into Godzilla
From cats towering over skyscrapers to dogs the size of mountains, you can turn any animal into a Godzilla-like version of themselves in Adobe Photoshop.
All it takes is enlarging the subject using the Transform tool, creating realistic shadows beneath the animal to give the impression of a scale, and adjusting the lighting to match the scene.
Moon Lanterns
Edit a boring lantern into a celestial masterpiece by replacing the lantern’s ordinary glow with the moon’s radiance.
The process is fairly simple; select and cut out a moon and blend it into another photo. It’s an excellent beginner project for when you want to practice your composite images.
Add Lens Flare
Adding a lens flare effect to images infuses them with a sense of atmosphere, a touch of drama, or a dreamy quality. It’s especially effective in landscape photography, where lens flares can accentuate the natural beauty of the scene and images set during the golden hour.
- Create a new layer and go to Edit > Fill. Fill the photo with 50% gray.
- Set the blending mode to Overlay.
- Go to Filter > Render > Lens Flare and choose the type of lens flare you want to add to your photo.
- Position the flare and click OK.
Create Realistic Tattoos
Want to get a full-sleeve tattoo but unsure how your chosen design will look on you? Boot up Adobe Photoshop and turn your vision into life without a permanent commitment.
Start the edit with two layers: a body part where you intend to have the tattoo and the tattoo design.
Use the Brush Tool, Pen Tool, and similar editing tools to draw or paste your chosen tattoo design onto the new layer.
Adjust the size and position it to fit your body part.
From there, all you have to do is to make the tattoo blend naturally with your skin.
You can also adjust the opacity to achieve the desired level of translucency.
If you’re happy with the result, you can take the Photoshopped image and show it to your tattoo artist to replicate.
Add Rain
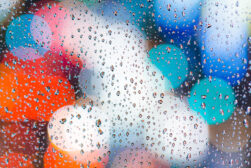
Rain comes and goes, so it can be difficult to time your photoshoot to capture the perfect rain-soaked moment. Instead of waiting for a rainy day, why not use Photoshop to add realistic rain to your images?
Adobe Photoshop made adding rain to images easy by using rain brushes and filters.
The key here is to add rain reflections on nearby surfaces and adjust the lighting to match the rain’s presence. You don’t want the rain to look out of place as if it’s an afterthought.
You want it to seamlessly blend into the scene and make it appear as realistic as possible.
Make Things Explode
Photographing an explosion is not only difficult to get right but also dangerous.
What if a piece of shrapnel flies in the camera’s direction, or worse, what if the shockwaves cause harm to you and your expensive equipment?
Instead of risking your safety for a picture that may not turn out how you wanted, use Photoshop to create an explosion effect.
By downloading an explosion effect in Photoshop, you can brush the explosion anywhere in your photo.
Outline Your Images
Here’s a fun and beginner-friendly Photoshop idea: outline your subject with bold, bright colors!
Outlining your images is an excellent way to make your subject pop from the background. You can use this technique to promote products, create funky art, or use it as a YouTube thumbnail.
Here’s how to add an outline to your image:
- Using the Pen Tool, create a path along the object you want to outline. Click at various points around the object, creating anchor points, and adjust the curves as needed. Close the path by connecting the last anchor point to the first one.
- Right-click and select Make Selection from the context menu to convert the path into a selection.
- Go to the Edit menu and choose Stroke. A dialog box will appear.
- In the dialog box, select the width and color of the outline. Experiment with different blend modes and opacity settings to control how the outline appears with the object and background.
- Once you’re happy with the outline, click OK.
Fold Reality Onto Itself With the Inception Effect
Create surreal and captivating images by folding reality onto itself.
In What Adventure’s YouTube tutorial, he creates a stunning “droneception” edit by combining advanced drone photography with a specific sequence of camera angles.
The resulting image is breathtaking, pushing the boundaries of what’s possible in photography and digital paintings.
It’s a somewhat advanced technique, so it’s aimed at those with a good amount of editing skills.


