


How to Change Canvas Size in Photoshop
Learn how to effortlessly adjust the canvas size in Photoshop, a crucial skill for tailoring your images to specific dimensions and layouts.
Photoshop | Software | By Judyth Satyn
This guide will give you the easiest ways to change canvas size in Photoshop.
I’ve been using Adobe Photoshop for many years, and I often need to change my canvas size.
Using either the Canvas Size action or the Crop tool helps you to change the size of your canvas.
Let’s dive into the tutorial.

Download a free copy of Adobe Photoshop to follow along with this simple tutorial.
Table of Contents
How to Change Canvas Size in Photoshop in 5 Steps
When displaying an image online or printing it, canvas size is important.
This is because canvas size affects the overall size of the file.
You won’t be blamed for wondering how canvas size differs from image size.
The difference is that when you change the canvas size, you are changing the size of the working area.
This means empty canvas space will be created when you increase the canvas size.
When you decrease the canvas size, the workspace will be reduced.
Reducing the workspace can result in the image you are working on being clipped.
When you change an image’s size, the image will be resized, and the workspace will be resized to accommodate this.
There is more than one way to change the canvas size in Photoshop.
You can change the canvas size using the Canvas Size option, or you can change it using the Crop tool.
Let’s run through them.
Option 1. Use the Canvas Size Dialogue Window
This is a good option when you want to increase a canvas to precise measurements.
For example, if your canvas size is currently 1400 px x 1400 px and you want to increase it to 1600 px x 1800 px.
When using the canvas resize, you can choose which border the extra canvas will be added to.
Plus, you can decide what the color of the extra canvas will be.
Let’s run through the options of the Canvas Size Dialogue Window.
Step 1. Add Measurement
Head to the top menu bar and select Image > Canvas size.

The Canvas Size dialogue window will pop open, displaying the current size of the image.
In this example, the measurements are Width 4000 Pixels x Height 2661 Pixels.

Enter the new canvas measurements under New Size beside the two value boxes: Width and Height.
Step 2. Change Measurement Unit
If you wish to change the measurement unit, click the downward arrow at the end of one of the value boxes.
A drop-down menu will appear. Here, you can select a measurement unit, such as Percent, Pixels, Centimeters, Millimeters, etc.

Click on the measurement unit to select it.
Step 3. Relative
If you know the exact measurement you want to increase the canvas to, do not tick the box beside Relative.
Tick the relative box if you want to add or subtract a specific amount of canvas space.
The value you enter in the Width and Height boxes will then be added to the canvas size.
If the value entered is more than the size of the canvas, the canvas will be increased by this amount.
Or if the amount is less, it will be subtracted from the canvas the current size.
Below is an example of the image when 8000 pixels are added to the Width value box when the Relative box is not ticked.
The entire width of the canvas is now 8000 pixels.

Below is an example of the image when the Relative box is ticked, and 8000 Pixels is entered in the Width value box (the Height value box is left empty).
The entire width of the canvas now measures 1200 Pixels, as 8000 pixels were added to the original 4000 pixels.

Step 4. Anchor Point
You can select to allocate the extra measurement to a specific border.
To do this, click within the Anchor square. The Anchor square is made up of 9 squares.

The arrows within the Anchor square depict the direction in which the extra canvas will be added or subtracted.
To change the direction, the border is added, click within the Anchor square. Where you click, a dot will be placed.
For example, if you click the central Anchor square, the extra canvas will be added evenly to the edges of the entire border.
As in the image below.

When you click on the top right corner square, extra canvas will be added to the bottom and left of your canvas.

As seen in the image below.

Step 5. Select Extension Color
The next option in the Canvas Size dialogue box allows you to decide the color of the new background.

By default, the color is set to White. Click on the downward arrow to select White, Grey, Black, or Other.
Choose Other or click on the white square, and the Color Picker dialogue window will open.

Select the color you wish the extended canvas to be.
If you want the canvas to be transparent or separate from the current image, you must create an extra layer.
To do this, drag the current layer on the Add Extra Layer icon at the bottom of the Layer Panel, a square with a plus symbol inside.
Alternatively, right click on the layer in the Layer Panel, and from the dropdown menu that appears, select Layer From Background…
Note: When you decrease the canvas size, areas of your image will be clipped and deleted.
Photoshop will warn you via a pop-up dialogue box before it cuts an area from your image.
You will be given the option to Proceed, Learn More or Cancel the action.

So be warned, when the image is saved, you won’t be able to retrieve the clipped areas.
Below is the image before the Width Value is changed from 4000 Pixels to 1500 Pixels.

Below is the image when the canvas is clipped. As you can see, areas of the image have been removed.

The Canvas Size method is good when you want to change the size of your canvas to an exact measurement, but it is slightly restrictive.
You won’t be able to add extra canvas unevenly to the borders. The Canvas Size option insists that all the extra canvas is evenly distributed.
Plus, you won’t be given a preview of the clipping or the extension.
This is why I prefer to use the next option when changing the size of my canvas in Photoshop.
Option 2. Crop Tool to Change Canvas Size
The Crop tool is my go-to preference for altering a canvas size.
One reason is that it is easy to access (hit C). The other reasons are because it gives you a preview of the edit, plus increased editing control.
Step 1. Select the Crop tool
Select the Crop tool from the Toolbar to the left of your canvas workspace, or click C for the keyboard shortcut.

Once selected, the Crop tool’s options bar will appear above your canvas workspace.
![]()
This is where all the editing fun happens.
Let’s check it out.
1. Ratio
The first option allows you to change the canvas size set to a measurement or ratio.
![]()
Click on the downward arrow beside W x H x Resolution to select a ratio.
From the drop-down menu, you can choose one of the set ratios.

If you have an exact measurement you wish to use, select W x H x Resolution and enter the measurement values in the boxes.
The first two boxes are for width and height, and the last box is for the resolution.
2. Resolution
You can set the resolution to Px/in (pixels per inch) or Px/cm ( pixels per centimeter).
![]()
To do this, simply click on the downward arrow beside the resolution value box.
![]()
3. Clear
Click clear if you wish to clear the values entered in the width, height, and resolution boxes.
![]()
4. Straighten
Use the Straighten tool when you wish to line the image up to a line, such as a horizon.
![]()
Click on the box beside Straighten, then drag your cursor across the line to indicate what you wish to straighten to.
5. Grids and Rulers
If you want to use a grid to make a more accurate size change to your canvas, use one of the Crop tools grids.
![]()
Click on the grid icon. This will open a drop-down menu displaying a selection of Photoshop grid overlays.

Choose a grid, and it will appear in your canvas workspace. The grid will move with the new selection area when the crop preview is generated.
The Rule of Thirds, Golden Ratio, and Golden Spiral Grids can be useful for creating an aesthetically pleasing canvas size change.
6. Crop tool Settings
Click on the cog icon to open the Crop tool preview settings.
A dialogue window will open. Tick the boxes you wish to use.

When using the Crop tool, I leave it on default settings, Show Cropped Area and Auto Center Preview.
7. Delete Cropped Pixels
If you intend to shrink your canvas, you might want to untick the Delete Cropped Pixels.
![]()
When ticked, all areas that are clipped from the canvas area will be deleted. This means you will no longer be able to recover them for future edits.
7. Fill
And last but not least, we have the Fill option.
![]()
Click on the downward pointing arrow, and you will be given two options: Default or Content-Aware Fill.
The Default option will fill the additional empty canvas with white.
Choose Content-Aware Fill, and Photoshop’s AI will generate an extension of the current image.
Below is an example of AI generative Content-Aware Fill.
The first image shows the empty canvas space selected using the Crop tool.

The image below shows the image extension created by Photoshop’s AI to fill the additional canvas space.

Now you know all the Crop tool settings, so how do you extend the canvas space?
Click on the canvas with your cursor and drag across the workspace.
As you drag the Crop tool, the crop handles will appear.
Drag the crop handles to the position to increase or decrease the size of the canvas space.
Photoshops default Crop tool grid will appear, divided into nine even rectangles.
If you have set a ratio or measurement in the Crop tool’s option bar, the crop handles will be locked to this dimension.
If you have cleared the boxes of values, you will have complete control over where you move the crop frame.
The Crop tool’s preview is useful when you want to see where the extra canvas will be created.

Pull horizontally or vertically outside the current canvas space to extend the canvas.
To pull the canvas horizontally, hover your cursor over the left or right crop border until an arrow appears.
Now, drag the edge across. The border will move with your cursor.
Do the same if you want to drag the crop box up or down.
The Crop tool will generate a preview of the new canvas size as it is extended.
The size of the new canvas space is shown in a black dialogue box that floats beside the crop handles.
The Crop tool gives you an additional option, the ability to rotate the canvas workspace while resizing it.
To do this, hover the cursor over one of the corners of the crop box until a bent arrow appears.
Drag the arrow to the right or left, and the image will rotate inside the canvas.
As you can see below, the crop box can be dragged inside or outside the image area.

Using the Crop tool, you have complete editing control. You can decide exactly where the increased area of the canvas will be.
Now you know how to change canvas size in Photoshop, enjoy editing.
If you liked this tutorial, you will also enjoy – How to Make a GIF in Photoshop ( 8 Free Methods).
FAQs
What is the shortcut for changing the canvas size in Photoshop?
The shortcut to altering canvas size in Photoshop is to hold Option, Command plus C (for Macs) or Alt, Ctrl, plus C (for Windows).
This will open the Canvas Size dialogue window. Here, you can enter the new canvas dimensions.
How do I adjust canvas size and canvas rotation in Photoshop?
To adjust canvas size and canvas rotation in Photoshop, use the Crop tool.
Where is the canvas size in Photoshop?
You will find the Canvas Size dialogue box by heading to the top menu bar and selecting Image > Canvas Size.
How to resize in Photoshop?
The tool you use to resize in Photoshop will depend on what you wish to resize.
If you wish to resize a layer or object, use the Transform tool. If you wish to resize a canvas, use the Crop tool or Canvas Size.
 100 Most Popular Photography Keywords in 2023
 How to Draw a Curved Arrow in Photoshop (And Save as a Preset)
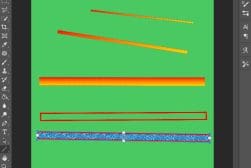 How to Use the Line Tool in Photoshop (All Three Ways)
 How to Print on Canvas at Home for Best Results
 13 Photoshop Selection Tools (How & When to Use Them)

Judyth is an experienced studio photographer and glass artist. When she isn’t Photoshopping comedians into the bellies of sharks, you can find her cooking delicious treats for her guests.
WELCOME TO SHOTKIT
Enter your email to be sent
today's Welcome Gift:
19 Photography Tools
🔥 Popular NOW:


Shotkit may earn a commission on affiliate links. Learn more.