Capture One vs Lightroom: 15 Differences Compared
If you're trying to choose between the two best photo editors in 2023, welcome to our Capture One vs Lightroom battle royale! See which software wins!
Capture One | Lightroom | Software | By Stephan Jukic
If you’re trying to choose between the two best photo editors in 2023, welcome to our Capture One vs Lightroom battle royale!
Before we delve into the nitty-gritty of these two of the best photo editing software apps, let’s get one thing straight – whichever option you choose, you won’t be disappointed.
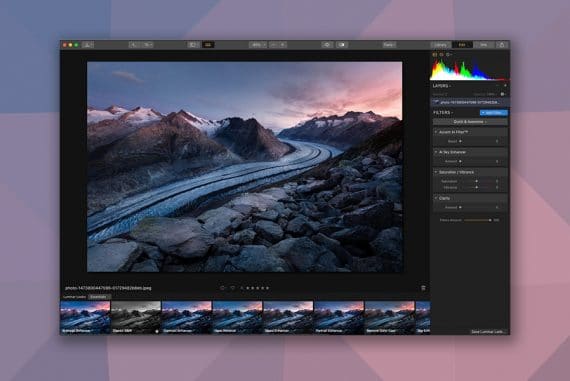
Capture One is the best option for pros, for its clean interface, brilliant fine-tuning capabilities, and powerful local adjustments. Use Code SHOTKIT10 for a discount.
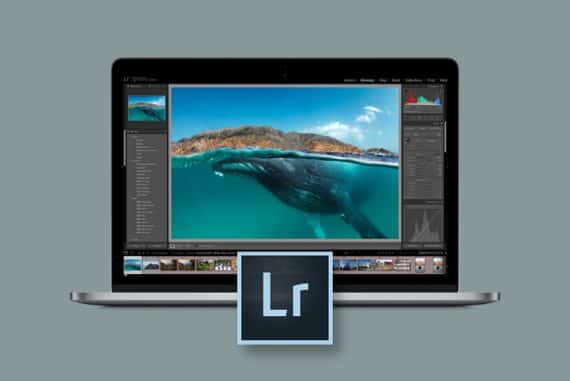
Adobe Lightroom Classic is the industry standard for professional and amateur photographers around the world – see our in-depth review for more.
However, Capture One Pro is its biggest rival, with legions of enthusiastic fans (the majority of whom are professional photographers), who wouldn’t use anything else – check the review here.
Take a look at this pros and cons comparison of the latest versions of Capture One Pro vs Lightroom Classic, to help you make your mind up about how to edit and organise your images this year.
- Related: Lightroom vs ON1 Photo RAW and Affinity Photo vs Lightroom
Table of Contents
Lightroom vs Capture One | Photo Editing Software
1. Interface
Both Lightroom and Capture One Pro offer extremely versatile, complex interfaces for a vast range of editing and photo manipulation options.
However, where Capture One really kicks ass is on its flexibility for customization.
The editing elements of the standard interface that the software suite opens up with can be shifted in all sorts of ways for a smoother workflow. Lightroom offers a bit of mobility with its developer tools, but that’s it.
A big benefit of Capture One is that it lets you create your own keyboard shortcuts for specific tools and functions, or change the ones that are integrated by default.
In this way, it fits better for customized editing workflow than Lightroom does.
In terms of how its interface handles layers, Capture One beats the Adobe competitor too. In Capture One, you can set single layers for nearly any specific tools that it offers.
This also means being able to have as many multiple layers as you need with all of them displaying their own masks and opacity, along with gradients and so forth.
All these different layers can also have their own sharpening levels and other photo calibration adjustments.
2. Organizing Photos
Capture One and Lightroom are similar when it comes to photo organization. However, depending on which version of Lightroom you’re using, it can offer some deeply powerful features that Capture One doesn’t quite match.
For one thing, Lightroom’s best version offers a facial recognition algorithm technology that lets you search and categorize photos based on who appears in them.
Obviously, this isn’t very useful for other kinds of photography, but if you’re a portrait or street photographer, it can be extremely helpful.
Furthermore, Lightroom’s latest versions come with A.I-powered keyword search tools that make sorting photos by various criteria simple and fast.
It also lets you set custom keywords for your own search criteria and search through photo metadata for even easier honing in on the specific shots you’re looking for.
Then there’s the Lightroom device-syncing capabilities of the Creative Cloud.
Lightroom CC (aka Lightroom Mobile) allows you to start editing a photo on your computer, and finish it off on your tablet or mobile phone, all the while backing everything up to the cloud.
Capture One lacks these powerful photo organization tools, and doesn’t currently have a mobile app either.
On the flip side, as it imports images, they appear in a scrolling menu on the right side, which is easy to search through for any specific photo you want to edit.
Taking aside Lightroom’s A.I., it’s facial recognition features, and mobile app syncing, the two programs are very similar in their photo organization functionality.
3. Color Adjustments

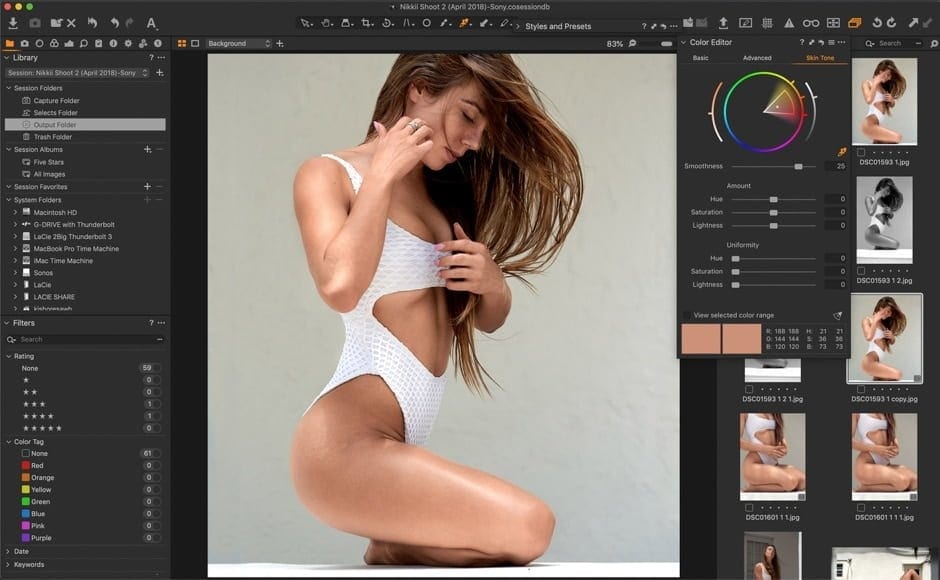
Multiple color options in Capture One Pro | Credit: Kishore Shaw
When it comes to color editing, Capture One Pro offers you a very advanced color wheel that allows for very precise, nuanced color grading and adjustments.
This design is also very user-friendly. Simply right-clicking on any part of a photo opens up this color wheel option, already centered on your selection.
Thus, in Capture One, you can easily adjust one single shade of green while leaving nearly identical hues (like an extremely close blue-green) completely intact.
There’s also a “pick color correction” eyedropper tools that lets you do some even finer tuning on specific parts of an image
Lightroom, on the other hand, offers a panel that’s so much more limited. It lets you edit hue, saturation and lightness of selected colors but offers none of the exactitude of its rival.
4. Custom Color Profiles
Because Capture One offers such a versatile functionality for adjusting colors far more precisely than can be done in Lightroom, its custom color profiles are also better.
Since it was developed for Phase One, a top-end digital medium format system, the color profiles in Capture One Pro are as good as they get.
What you get when you import photos into Capture One 20 will look very much like what your camera previewed when you took a shot.
The editor helps this out by having different color profiles for different camera brands and types. The overall effect is a tendency toward brighter, more vibrant photos from default.
With Lightroom, your starting point will be more neutral because the software tends to deliver a more generalized color profile across all imported photos from most camera types.
From there, you can make adjustments towards deeper saturation, brightness and so forth.
5. Local Adjustments
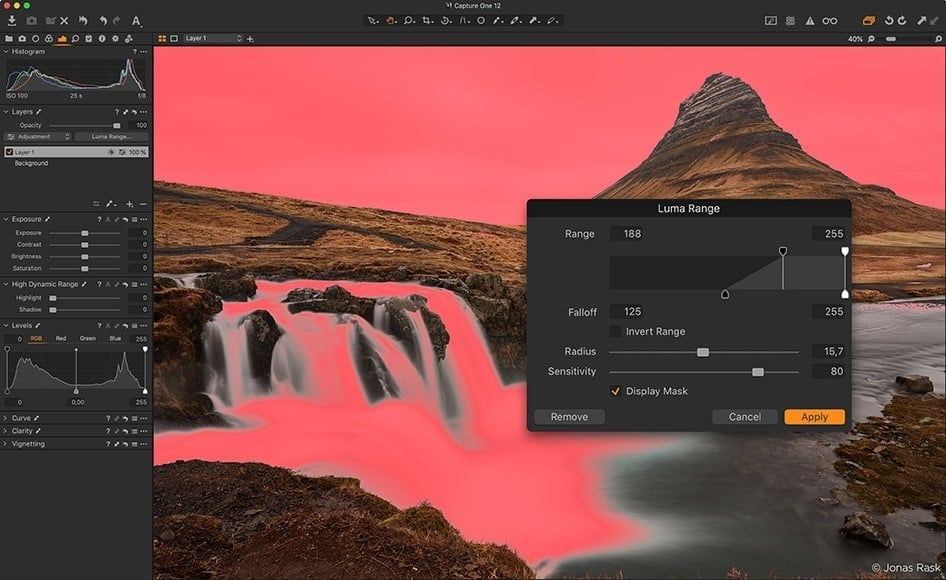
Powerful local adjustments in Capture One | Credit: Usnea Lebendig
Capture One and Adobe Lightroom both have plenty of global adjustment tools for a whole image and for specific sections of a photo too.
However, Capture One comes with a major bonus with its extremely versatile layering functionality that we described above. This lets you adjust photos locally with many layers as well.
Lightroom isn’t capable of this same level of flexibility for local adjustments through numerous layers.
Instead, if you’re using Adobe products, you need to transport your images to Photoshop (which does offer layer options to rival those of Capture One), then re-import each image back to Lightroom.
While Lightroom and Photoshop do integrate well, this is obviously a more tedious process.
6. Camera and Lens Support
In terms of camera and Lens support, most users of common camera or lens types probably won’t notice a major difference between the two platforms.
That said, in absolute terms, Lightroom tends to come out with support for the RAW formats of the latest cameras more quickly than Capture One, and supports a generally wider range of lesser-known cameras and lenses.
This even includes certain older, more obscure models.
On the other hand, Capture One also supports the majority of cameras and lenses. As of more recently this also includes several medium format models that aren’t as commonly used by most photographers.
7. Presets


Presets such as the one above are available for both Capture One and Lightroom, so you probably won’t have a problem finding and using something that suits you with either platform.
Lightroom, however, is more versatile on this and you can even download many different premade presets that other photographers have made already for it.
This obviously also means that you can make your own too, or find free Lightroom presets online – here are some good ones.
Another thing that Lightroom also offers is bulk presetting, which lets you apply a specific preset to thousands of photos at once.
Capture One offers many of the same preset options as Lightroom and also lets you apply them in bulk, but its ecosystem of existing presets and those made by others is much narrower at this time, which means more legwork if you need something very specific.
8. Help/Support (how to, tutorials, etc.)
For “How To”, support and tutorials for users, there are plenty of resources for both Capture One and Lightroom from both the manufacturer end and from other professional users on the internet.
However, the ecosystem for online tutorials is far more extensive for Lightroom than for its rival.
YouTube videos and other types of third party “how-to” guides are available for just about anything you could want to learn as you go about Lightroom, and Adobe offers some fairly robust support options as well.
The Adobe software suite is also more beginner-friendly in general than some Lightroom alternatives, with an ecosystem of presets (mentioned above) and third-party plugins (here’s our article on the best Lightroom plugins), that can make using it easier.
Until late 2018, Capture One didn’t even allow third-party plugins.
Aside from this, as the option with a smaller, more professional user base, it comes with fewer third party resources in general.
9. Panoramas and HDR
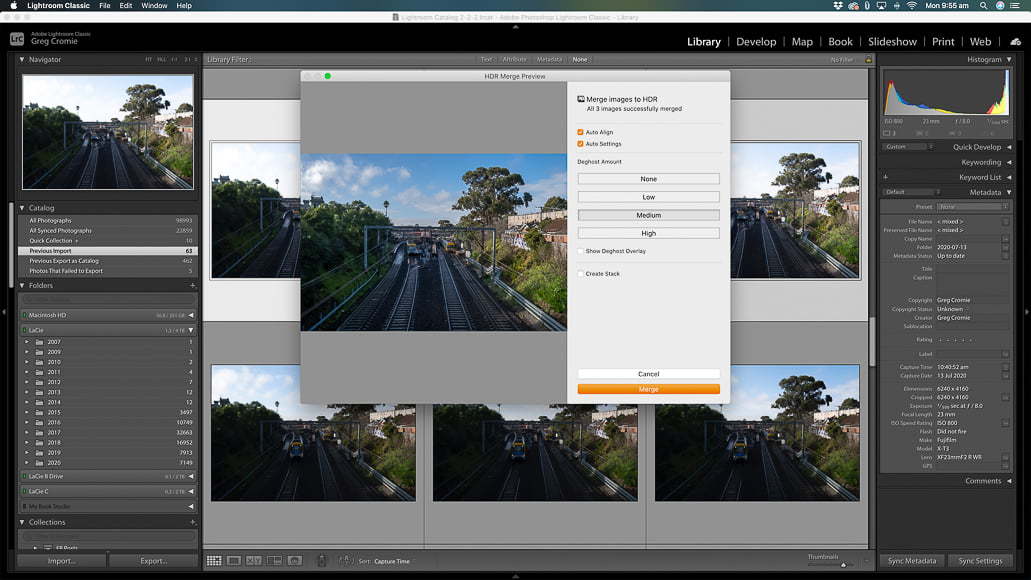
HDR merging feature in Lightroom | Credit: Erin Spiller
The latest version of Lightroom offers superb panorama functionality, and this is helped enormously by the software’s saving of these exports as DNGs instead of enormous TIFF files.
The HDR rendering of the Adobe product is also famously excellent compared to nearly any Lightroom alternative.
Yes, Capture One offers much better color correction and layering tools for adjustments, but Lightroom’s innate HDR conversion quality has it beat.
In fact, even the latest version of Capture One doesn’t yet natively support either panoramic photo stitching or HDR stacking for photos as of mid-2020.
To get these features, you have to use an external editor or a third-party plugin or tool.
10. Export Options
Capture One and Lightroom both offer export options. Still, Lightroom’s version is definitely simpler because it lets you access export presets much more easily directly right after right-clicking and navigating to “export”.
However, with Capture One, you do have several additional options, but you need to manually add them to your export tab.
Thus, by adding Output Location, Process Recipes, Process Recipe (different things), Output Naming, and Process Summary to your Export tab, you’ll be able to make Capture One perform almost as well as Lightroom.
This all still means taking some extra steps, but it’s definitely useful for making Capture One more friendly at exporting. What’s more, the software lets you export several versions of a photo at the same time.
Lightroom can match these additional aspects of Capture One with a number of easy-to-install third-party plugins, however.
11. Default Color Quality
This is a tricky question to answer when comparing Capture One and Lightroom because it depends a bit on what you prefer as a photographer.
By default, we’d say that Capture One offers slightly richer, more default vibrant color rendering that also more closely matches the color profile your photo had right as it was taken.
Lightroom, on the other hand, opts for a very slightly more neutral default style that you can then play with through its editing features.
To complicate things further, both Lightroom and Capture One come with more than one default color rendering standard – see our article on what is image rendering.
In Lightroom, you can choose among options like Camera Standard, Camera Vivid, and etc. With Capture One, there are several options like Portrait, Auto Curve and Film High Contrast, among others.
Each of these creates different default effects for imported photos,
To simplify thing as much as possible, a comparison between both software suites most standardized defaults is necessary. In Lightroom, this is Adobe Standard, and in Capture One it’s Auto Curve.
Comparing these two basic color defaults, we get a clearer picture of how the two programs measure up against each other, and they’re too similar to say anything definitive.
12. Tethering

Tethering features in Capture One Pro makes it a great choice for studio photographers.
Capture One and Lightroom both support tethering but the former’s implementation is so much more awesome that any photographer who uses tethering and doesn’t already know this is missing out.
For photographers who want to use tethering, Capture One offers a unique Live Mode functionality. It also allows for numerous photo adjustments from your laptop, as the software renders the live image.
It’s worth noting that Live Mode isn’t available for all camera models when using Capture One for tethered photography.
The Lightroom implementation of tethering is a much weaker thing, with no Live Mode option or other features, and if you’re doing studio photography, Capture One definitely kicks more ass with its tethering features.
13. Learning Curve
Lightroom and Capture One are both complex software suites with many features that a beginner photographer could take months to really master.
However, Lightroom is the simpler of the two software suites and surrounded by a much larger ecosystem of instruction guides, tutorials, presets for images and third-party plugins for easier or more flexible use.
Capture One is more of a professional photographer’s tool (originally developed for Phase One – a high-end camera system), that blends aspects of what both Lightroom and Photoshop offer along with many of its own features. Thus, it can get more complex.
This applies especially if you’re transitioning from Lightroom to Capture One.
Going from Capture One to Lightroom is, in fact, easier since the latter offers simpler functionality.
14. Speed and Performance
In terms of overall speed for importing photos, exporting photos, generating previews and rendering individual images across different layers and adjustments, Capture One beats Lightroom either slightly or by a wide margin at times.
It’s also a more stable, crash and freeze-free program.
While there are ways to considerably improve the speed at which Lightroom operates (see our guide for the top tips), it would be great if Adobe managed to ‘bake-in’ the best performance when updating their popular software.
15. Pricing
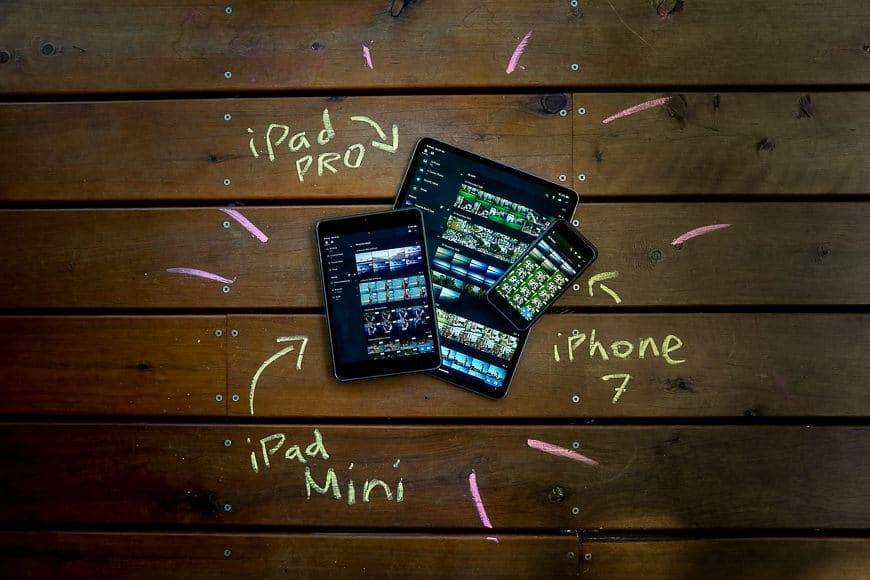
An Adobe Creative Cloud subscription allows you to sync Lightroom across multiple devices, making it excellent value for money.
Both Lightroom and Capture One are priced with a subscription model of monthly or annual payments instead of large single-use payments.
Lightroom costs less per month than Capture One, and the Adobe Creative Cloud subscription comes with Photoshop and online storage included, allowing you to back up and sync your images and edits across multiple devices.
However, Capture One offers certain things that some photographers might consider extremely important (such as better layer options, color editing features and tethering).
Adobe offers a Lightroom/photoshop subscription for free during a 14 day trial (but requests credit card info and email address) – get it here.
Capture One Pro is available free for 30 days with just your name, a password and email address for verification – download it here.
Capture One vs Lightroom: Final Words
Overall, Lightroom and Capture One are both fantastic programs for both light and pro image retouching.
However, in terms of key features, flexibility, and even performance, we’d have to argue that Capture One is the more robust tool for your photography needs.
If you’re just starting out as a photographer, Lightroom might be easier to use, but it might also be better to just learn whichever platform you need right from the beginning. You can always switch back later.
How about you? What have you chosen to edit and organise your precious photos?

Capture One is the best option for pros, for its clean interface, brilliant fine-tuning capabilities, and powerful local adjustments.


