How To Create Web Galleries in Lightroom To Share Photos
Lightroom web galleries are a simple and fast way to display and share a selection of photos online, either privately or publicly. Here's how to do it.
Lightroom | Software | By Ana Mireles
Do you know that you can create web galleries in Lightroom to share with your friends, families, or clients?
Lightroom web galleries are easy to create and customize to suit your branding or preferences.
Popular course reveals the simple tricks to getting incredible results with Lightroom in record time. Give Your Photos The Look They Deserve!
![]()
I like to use Lightroom galleries when I want to show clients a selection of photos so they can pick the ones they want.
In this article, I’ll give you a step-by-step guide and answer some questions about sharing your Lightroom galleries and other uses.
And if you’re a complete beginner, check out our guide on how to use Lightroom Classic.
Table of Contents
What are Web Galleries in Lightroom?
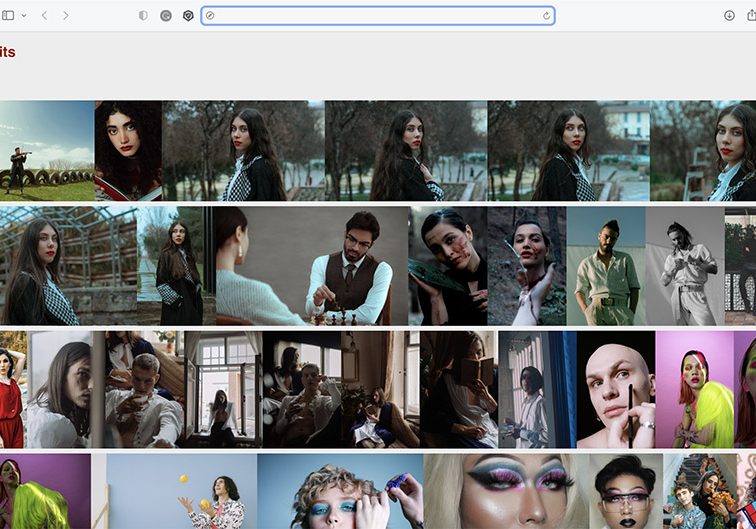
A Lightroom web gallery is a website where you can display your photography. The web gallery is made with thumbnails of your photos.
Whenever you click on a thumbnail, it will link to a larger image size.
Web galleries are used to share photos with friends, family and even your clients, giving them the ability to leave comments and download the pictures.
You’ll need to download the latest version of Lightroom (if you don’t own it already) to start using galleries.
How Do You Create a Lightroom Web Gallery?
It’s very easy to create web galleries in Lightroom; just follow these steps.
Step 1

Start by selecting which images you want to include in your web gallery. You can do this in the Library module using the Grid or the Filmstrip.
If you’ve already selected and compiled a collection or separated the desired photos in a folder, you can choose that on the left panel.
Step 2

Now you need to switch to the Web module. The images you selected in the Library module will be in the Web module.
Here, you can re-arrange them in the order you want. To do this, you can click and drag them on the Filmstrip.
Step 3

Now you can choose a template. This will determine how your web gallery looks. To change the template, simply click on it, and the content will update automatically.
It’s also possible to use a third-party web gallery. To find them, you can visit the Adobe Exchange marketplace.
Otherwise, you can click on the button ‘Find More Galleries Online’ you’ll find in the Layout Style panel. This will open your browser window directly in Adobe Exchange.
Step 4

You can further customize your web gallery using the panels on the right side of the Web module. The available choices are different depending on the template you chose.
In the Color Palette panel, you can select different colors for the template’s background, texts, icons, and other elements. Some of them will limit your color choices. If you can’t find the color that matches your brand or what you’re looking for, consider changing the layout.
You can change the settings for the Grid Pages and Image pages in the Appearance panel. Next, you can choose whether or not you want a title and caption displayed.
After that, you can control the Output settings. Here, you can control the quality of the larger images, the metadata, copyright information, and the watermark.
Step 5

Once you’re happy with how your web gallery looks, you need to input the website information. You can do this in the Site Info panel on the right side.
Here you can enter the title of the website and the gallery, and the description. You can then add your contact information.
Step 6
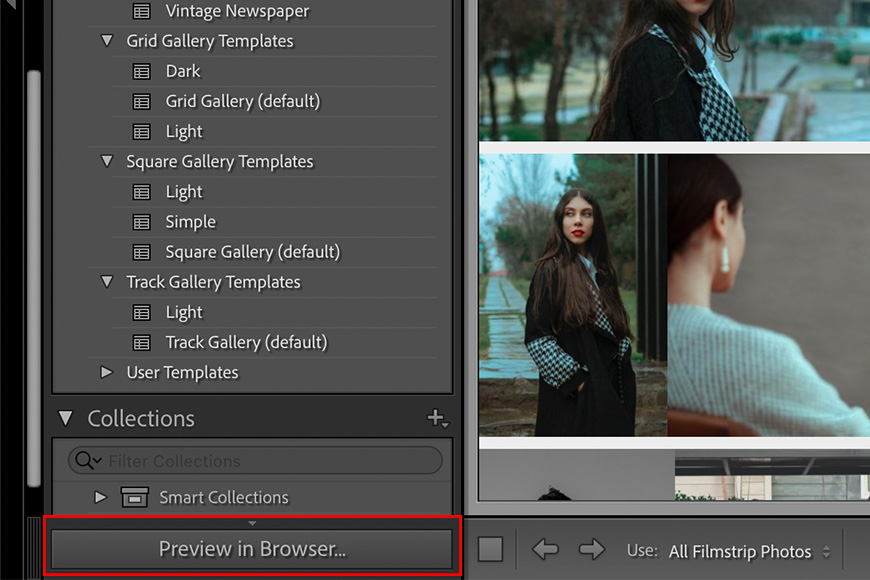
Before you export or upload your gallery, checking how it looks on your browser is always a good idea. To do this, click the ‘Preview in Browser’ button in the bottom left corner.
How do I share a web gallery from Lightroom?
To share your web gallery with anyone, you need to export it. To do so, click the Export button on the bottom right corner of the module.
This will open the saving dialogue box. Input the name and choose the destination folder. Then, click save. You can share this folder when you want someone to see your web gallery.
When you open the folder, look for the file called index.html. Double-click on it, and it will launch the web gallery on your browser.
Can I make a website using the web gallery in Lightroom?
It’s possible, yes – but not advisable. The web gallery in Lightroom uses basic HTML. While creating a website with it is possible, you need to know how to use HTML and own a website. It won’t make for the most eye-catching website, either. Instead, try using Lightroom collections and Adobe Portfolio.
Can I share a web gallery with a client on the web?
Yes. The client doesn’t need to have Lightroom to see your web gallery created in your Lightroom. Simply download the web gallery to your computer. Then, send your client the folder and ask them to click on the index.html file. This will launch the web gallery on their browser.
Why should I do a web gallery in Lightroom?
Web galleries in Lightroom are an easy way to share your work remotely without needing a website. You can create a quick portfolio to apply for a specific job or send it to the client so that they can choose their favorite photos from a photoshoot.


