How to use Leading Lines in Photography
The best photographers know this simple technique for taking captivating shots. Are you using Leading Lines yet? Learn about it in this guide!
Learn | Photography Guides | By Andy Day
Leading lines can be an excellent way to engage a viewer, draw them into your photograph and push their eye towards a focal point.
Leading lines can create drama or instil a sense of balance in your photography. Learning how to see opportunities and incorporate them into your work can improve your compositions and help you to create more impactful photographs.
Leading lines can change the way that you work and shift how you see the world through your lens.
If you want to know how to take better photos this year, here’s why you should be using leading lines in your image-making.
Table of Contents
What are Leading Lines in Photography?
Photographers use leading lines to lead the eye of the viewer, offering psychological nudges based on how the human brain perceives images.
They are simple lines that occur naturally within a scene but are used as a compositional tool to frame or lead towards the focal point of a photograph.
Leading lines can be clear lines within an image such as the horizon, a railing, or the curve of a river.
They can also be more subtle, perhaps as a repeated pattern that leads the eye – such as a series of lampposts disappearing into the distance.
If you are wondering what the types of leading lines in photography are, here are six that you will commonly encounter:
- Horizontal Lines – The most obvious horizontal line is that of the horizon, and they typically give the viewer a sense of stability that can also invoke feelings of calm, tranquillity, neutrality and openness. You’ll often find them in landscape photography, running across the full width of the image and potentially dividing the image into different geometric chunks of differing tone or texture.
- Vertical Lines – Vertical lines invoke feelings of strength, stability, and solidity, often hinting toward the main subject’s grandeur or power. Architectural photography typically seeks to create perfectly vertical lines, often parallel, to give a sense of presence, permanence, and precision.
- Diagonal Lines – The human eye loves diagonal lines in photography or in nature, especially when they lead at a sharp angle away from the edges of the frame, both contrasting and complementing the vertical and horizontal boundaries that confine an image. As a result, diagonal lines give a sense of drama and can invoke movement; alternatively, they can lead the eye on a journey from the foreground and into the background creating a heightened sense of depth in a two-dimensional medium.
- Converging Lines – Lines that are not parallel and are slowly moving together are converging lines and can be a compelling means of pushing the viewer’s attention towards the focal point of a photograph, moving the viewer from one part of the image to another.
- Curved Lines – Curved lines occur more often in photographs of nature and can give an image a more organic or softer feel. For example, the sweeping curve of a shoreline might lead the viewer’s eye towards the horizon.
- Implied lines – Implied lines can occur when there is a person (or animal) in your photograph whose line of sight points towards the main subject of your photograph. For example, you might be shooting a wedding from the back of the church, and members of the congregation are all looking at the bride and groom. Alternatively, the implied line might be suggested by an arrow — perhaps on a signpost or on the road — that is pointing towards the photograph’s focal point.
Why are Leading Lines important in Photography?
Leading lines in photography draw on the human brain’s natural inclination to find patterns within imagery.
Since we tend to find visual satisfaction through certain tropes, leading lines can make your images more engaging and really grab a viewer’s attention.
Leading lines are one of the elements of line, shape and form in photography composition.
Which Lines have the Greatest Impact in a Photo?
The impact of the different types of leading lines very much depends on what you are trying to achieve in your image. Horizontal lines will create a sense of balanced calmness, perhaps giving your landscape photograph a tranquillity that gives the viewer a sense of ease and connection with nature.
By contrast, a wide-angle lens staring up at skyscrapers using lots of diagonal lines will create a sense of drama, of scale, and almost vertigo-like feeling as the buildings tower over the viewer.
Leading lines will both reflect and shape the mood and feeling of your image.
While you might not set out by thinking, “Right, I want some vertical lines in this photograph,” it’s worth considering how they can affect the ways in which your image will be perceived.
Leading Lines vs Paths – What’s the Difference?
Knowing the difference between leading lines and paths isn’t essential, but if you come across a reference to them and wonder what they mean, it’s useful to know.
A path is simply a leading line that points to the horizon — perhaps several paths converge at a vanishing point — rather than a specific focal point within the image.
As soon as a path points to anything else, it’s a leading line.
11 Tips for Using Leading Lines in your Photography
1. Build your awareness

Leading lines photography can be used to add a sense of drama to an image.
The first step to using leading lines in your photograph is to build your awareness of how they occur and where you can find them.
How Much Do You REALLY Know About Photography?! 🤔
Test your photography knowledge with this quick quiz!
See how much you really know about photography...

By browsing through the work of successful photographers to see as many examples as possible, you will build up an unconscious knowledge of how leading lines are used. Henri Cartier Bresson is a great place to start.
When you’re out with your camera, start looking at the world more in terms of geometry and leading lines will start to present themselves to you organically.
2. Explore the world through your viewfinder
As your photographic eye develops, leading lines become easier to spot – but even experienced professionals find themselves using their camera’s viewfinder to help them discover the right composition.
Your camera’s lens will shift your perception of the world — especially if you have a wide-angle lens fitted — and trying different vantage points while taking test shots will help you to discover the perfect frame.
3. Get close to a surface or an object

Photographers use leading lines to lead the eye of the viewer towards the focal point of a photograph.
Creating a sweeping perspective can often be achieved simply by getting closer to a surface, and leaning up against a wall can be a quick and easy way to create converging lines that lead towards a specific subject.
Similarly, moving your shooting position close to an object such as a tree branch or a railing can then use that object to draw a line that leads into the rest of the frame while also creating a strong sense of depth.
4. Get low — or high

The viewer’s eye is naturally drawn to the parallel lines of the railing.
If you imagine yourself on a footbridge with railings either side, dropping the camera lower to the ground can suddenly make the railings on either side sweep in from closer to the corners of an image. This sharpens the angle at which they enter the image making them more diagonal and thus more dramatic.
Getting a higher position can achieve something similar, so don’t be afraid to climb up onto the railings (as long as it’s safe!), or simply hold the camera above your head and take advantage of your camera’s tilting rear LCD to frame up your image.
5. Think about your background
So often when we’re shooting, we become caught up with our subject immediately in front of the lens.
However, you can often find leading lines if you give some thought to what is in the background.
6. Think minimal
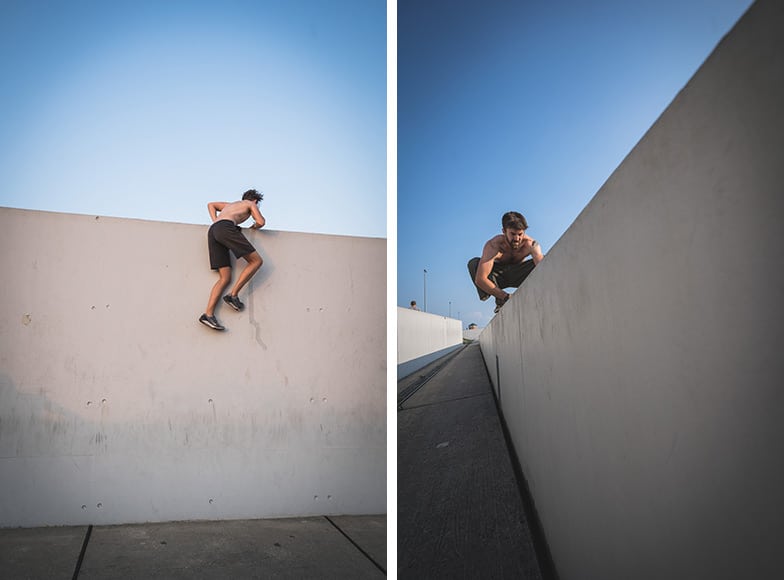
Use leading lines to draw attention to the main subject of an image.
Finding geometric shapes — and thus leading lines — is often easiest when the scene in front of you is less cluttered. With fewer objects breaking up your scene, the leading lines will often be longer and therefore, more pronounced.
Empty natural landscapes and clean architecture lend themselves well to this style of shooting, offering plenty of opportunities to frame up a shot that is more like a jigsaw of strong geometric shapes.
Take the HARD Photography Quiz! 🤯
Now it's time to really test your photography knowledge!
(99% of people can't get all the questions right...)

7. Use a wide-angle lens

Use lines around your subject to create drama or instil a sense of balance in your images.
For many starting out in photography, using a wide-angle lens can be a bit intimidating because there’s so much happening in the frame that it can start to feel chaotic and out of control.
This is where seeking out minimal scenes can be of great help. Reduce the clutter by finding empty landscapes or architecture with clean, sweeping walls, and suddenly the wide-angle lens feels much more manageable.
The big advantage of the wide-angle lens is that it offers you a huge amount of depth through the increased sense of perspective. Be careful not to go too wide — anything beyond 16mm (or 10mm if you’re shooting on APS-C, 8mm on Micro Four Thirds) can be hard to manage.
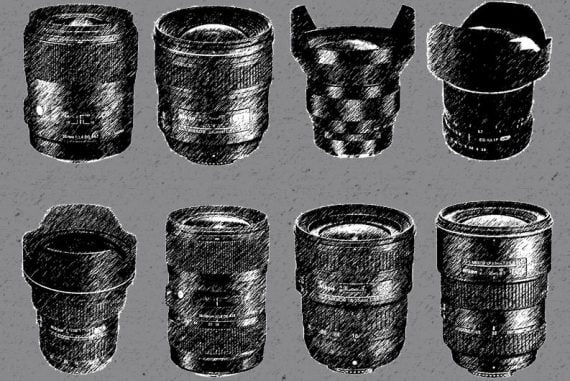
If you’re looking to buy a wide-angle lens to create stronger images with leading lines, avoid fish-eye lenses and, if possible, try and buy a lens that is rectilinear. Non-rectilinear lenses bend vertical lines as they get close to the edge of the frame, making the image feel distorted and unnatural.
By contrast, a rectilinear lens keeps straight lines straight and is closer to what our eyes see naturally.
8. If it’s meant to be straight, make it really straight
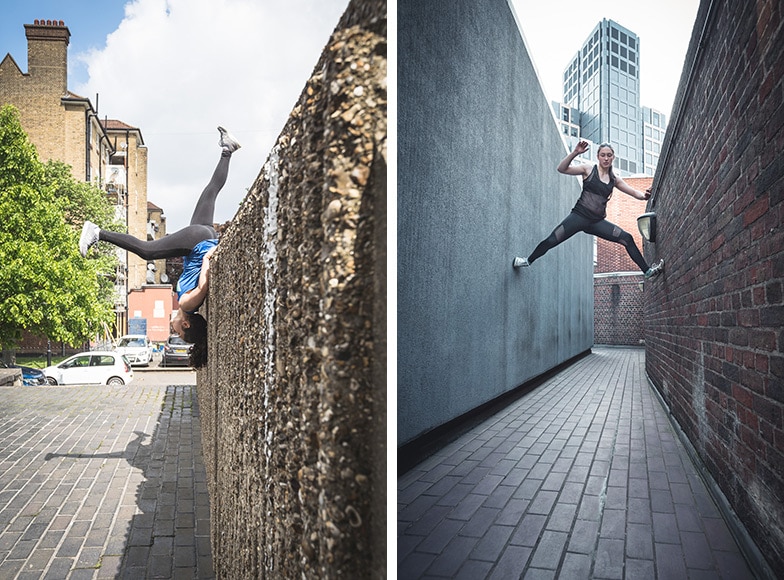
Lines leading vertically should be straight!
For some reason, our appreciation of geometry means that our brains love vertical lines that are absolutely vertical. If something is slightly off vertical, many people’s OCD will start bugging them.
Similarly, horizons need to be horizontal to give us a sense of balance and satisfaction. If a horizon is off by a couple of degrees, it can feel unsettling.
Not every line has to be perfect, but if you’re using horizontal or vertical lines as your leading lines, consider keeping them as horizontal and vertical as possible. Many mirrorless cameras have the option to show a level while shooting, helping you to make sure that you’re not slightly skewiff.
9. If you didn’t make it straight in camera, make it straight in the edit
Software such as Lightroom comes with a series of tools for straightening out your images.
If your lines aren’t quite vertical or horizontal, first try the crop tool, either drawing a line across the horizon or using the rotate handles to get it lined up.
If that’s still not enough, you might need to skew your photo a little, and this is where the Transform panel comes in handy. You can draw two horizontal and two vertical lines to get your image geometrically perfect.
10. Beware of dutch angles
The term dutch angle comes from a style used by German filmmakers during the First World War. It describes the technique of turning the camera to deliberately tilt the horizon away from being perfectly horizontal.
A Dutch angle or Dutch tilt is a great way to introduce diagonal leading lines into your image but just keep in mind that it can quickly become quite tired.
It can be a fun way of shooting buildings (though it tends to become less pronounced the more you get low and lookup), but if you’re shooting people, it can be distracting and unsettling.
The human eye likes a horizontal horizon, and the dutch angle can introduce unwanted tension and unease into an image.
Basically, make sure you have a good reason to tilt your camera to a Dutch angle and keep in mind that you might want to use it sparingly.
11. Go fishing
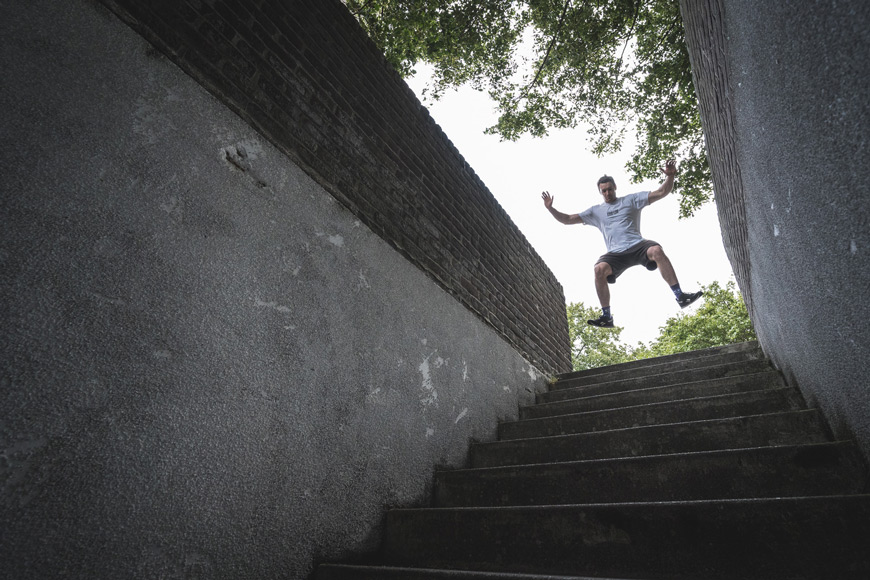
Hit the streets to find lots of options for leading lines photography.
Street photography is full of opportunities for incorporating strong leading lines into your imagery but getting the timing right can be challenging. One trick is to find a composition and then wait for someone to walk into frame, positioning themself perfectly in amongst all of your leading lines.
Fishing for street photographs is a tried and tested method for making sure you get the shot that you want.
Final Words
Careful use of leading lines can allow you to create much stronger compositions in your photography, making your images more engaging and eyecatching, and truly drawing a viewer into a scene.
Hopefully, there’s a lot of information to give you an idea of how to start incorporating leading lines into your work. If you have any further suggestions or want to ask a question, feel free to get in touch via the comments below.

Check out these 8 essential tools to help you succeed as a professional photographer.
Includes limited-time discounts.


