Understanding & Fixing the Rolling Shutter Effect
Is the rolling shutter effect such a big deal when shooting video? How do you avoid it? Can you fix it? Discover all the answers to these questions and more.
Learn | Photography Guides | By Greg Cromie
In this guide, we’ll take a beginner-friendly look at the rolling shutter effect.
It’s a common problem with many cameras that causes rolling shutter distortion to appear in your photos.
(It’s otherwise known as rolling shutter artefacts and the jello effect – I promise it will make more sense soon!)
Plus, we’ll take a look at the difference between a rolling and a global shutter – the first step to managing successful image capture and avoid this shutter effect.
Even professional photographers have problems avoiding rolling shutter distortion in photos and videos… but it’s not all doom and gloom as there are some simple steps you can take to manage it.
Read on to discover what the rolling shutter is, how to avoid it and even how to fix it – plus answers to many more common questions.
Table of Contents
What is the Rolling Shutter Effect?
The rolling shutter effect takes the form of distortion appearing in photos where an object (or the camera) is moving quickly.
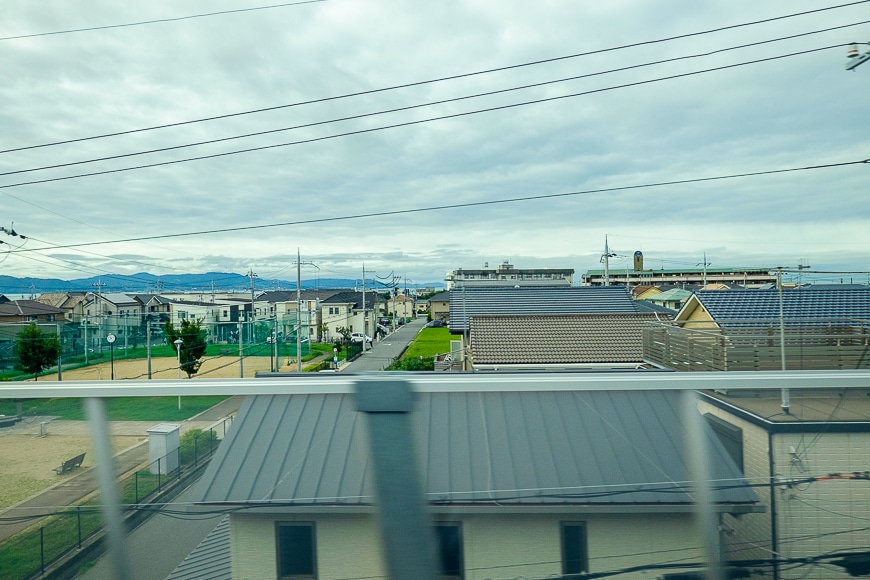
When taking a photo from a train window, objects with strong vertical shapes will appear bent at the top or bottom of the image. Sometimes they appear as though they are leaning over.
If the subjects are still, but you pan the camera quickly, it may produce the rolling effect. The rolling shutter distortion also impacts video recording in the same way.
The way you expose the camera sensor to light causes the rolling effect. While camera manufacturers continue to minimise the distortion, it’s still evident in certain circumstances.
Most camera shutters use a pair of curtains that slide vertically across the image sensor area. There’s a gap between the curtains, and as the opening moves across the sensor, it’s exposed to light and captures image detail.
The rolling shutter effect occurs due to the pair of curtains moving too slowly to quickly capture the details of a fast-moving subject.
As a result, the camera sensor does not capture the top and bottom of the image simultaneously.
- What is the difference between rolling and global shutter?
A rolling shutter uses a pair of curtains to expose the camera sensor to light.
The curtains move vertically across the sensor with a small horizontal gap between them. As the opening moves across the sensor, the light hits the rows of sensor pixels and record image detail.
Pro level DSLR cameras usually feature a global shutter that does not suffer from this issue.
It features a shutter that exposes the entire sensor in a single motion rather than a portion at a time. It requires the shutter curtain to move out of the sensor’s way for the total exposure time.
When reading a book, our eyes act like a rolling shutter. We cannot read the whole page of text at once – we need to read line by line.
- Why do cameras use the rolling shutter?
There are a few reasons why camera manufacturers choose to use rolling shutters in some of their cameras.
It’s important to know that cameras that feature a CMOS sensor have rolling shutters. CMOS is one of two types of image sensors – CMOS (Complementary Metal Oxide Semiconductor) and CCD (Charge Coupled Device).
CMOS sensors are popular in mirrorless cameras and cropped sensor DSLRs as they’re cheaper to produce – many video cameras use CMOS sensors to capture footage… but they’re not as fast as CCD sensors and can’t capture and process the data as rapidly.
Most cameras with CCD sensors use a global shutter – typically found in DSLR cameras. A global shutter exposes the whole sensor to light in one hit.
How Much Do You REALLY Know About Photography?! 🤔
Test your photography knowledge with this quick quiz!
See how much you really know about photography...

As a result, the CCD sensor manages all the data simultaneously – read, process and store.
With a rolling shutter, the sensor only manages the areas already exposed to light in sequential order – one line of data at a time.
How do you Avoid the Rolling Shutter Effect?
There are a few ways to avoid the rolling shutter effect. The first is to understand why it happens and in what type of scenes it can occur.
By knowing about the rolling shutter effect (thanks to this handy guide), you can plan for it with the way that you take photos.
Here are some of the best ways to avoid the rolling shutter effect.
- Increase Shutter Speed
Keep in mind that the delay between the top and bottom of the sensor recording a scene causes rolling shutter.
One way to reduce the rolling shutter effect is to reduce that delay as much as possible. The simplest way to do so is to increase the shutter speed – it moves the shutter faster across the sensor’s front.
If you’re getting the shutter effect at 1/125 of a second, double it to 1/250 of a second and check the results.
Remember, increasing shutter speed reduces the amount of time the sensor has to capture enough light. Compensate for this by increasing ISO or use a wider aperture.
For more tips on managing exposure check out our article on the Exposure Triangle.
- Pan Carefully
When taking action shots of fast-moving subjects such as race cars, the temptation is to pan the camera to follow the car.
But doing so may result in a rolling shutter – especially if there are vertical fences, posts or trees in the scene.
If you pan the video camera slower, the race car will speed out of the field of view and you’ll miss the shot. However, if you pan it carefully and use a faster shutter speed, you can reduce the rolling effect.
Check out our shutter speed chart for a visual example of what settings to use when panning.
- Image Stabilization
Some cameras feature in-body image stabilization or IBIS. When a camera features IBIS, it detects unwanted camera movement and compensates by shifting the sensor to match the action.
In some cases, the camera use a cropped frame to minimise the look of camera shake and micro jitters.
Plus, IBIS allows you to shoot at slower shutter speeds even with a narrow aperture. IBIS helps avoid the rolling shutter effect by reducing unwanted camera movements that increase the impact.
- Tripods and Gimbals
Another way to stabilize your camera is with a tripod or a gimbal (stabilizer). Using the same idea as IBIS, reducing any unwanted camera movement can avoid the shutter effect.
- Choose a Better Angle
When a subject moves horizontally across the field of view, the rolling shutter effect is obvious – for example, a freight train zooming past at a crossing.
A simple way to avoid the rolling shutter effect is to change the angle of view.
Try moving to a better position, such as a 45-degree angle to your subject. That way, you can still take the photo, but rolling shutter effects will reduce if not completely avoided.
- Increase Frame Rate
Rolling shutter artefacts also impact video recording in the same situations – panning, fast-moving subjects and camera shake.
Just like taking a photo, the same techniques apply to avoiding it when recording videos.
Stabilizing video cameras with CMOS sensors using a tripod, gimbal, or even a shoulder rig will go a long way to minimising the rolling shutter effect.
But by far, the best way to avoid rolling shutter problems while capturing video footage is to increase the frame rate – just like increasing the shutter speed.
With increased frame rates, the rolling curtains move at twice the speed and reduce the time difference between the sensor’s top and bottom.
A good starting point is to double the frame rates and review the outcome.
Can Rolling Shutter be Fixed?

Yes, a rolling shutter can be fixed… but it’s always worth doing your best to avoid it as much as possible.
Take the HARD Photography Quiz! 🤯
Now it's time to really test your photography knowledge!
(99% of people can't get all the questions right...)

However, rolling shutter can’t be avoided in some cases, and your images will still have evidence of the effect. But fear not, there are easy ways to fix it with post-production or editing software.
As discussed, it often impacts the top and bottom of the image. If you’re aware of this when taking the picture, then shooting at a slightly wider angle.
That way, there’s more scene in the image and this can be cropped later on in image editing software.
When you crop a picture, you’re chopping off a little bit of all four sides of the frame. In doing so, you can crop the parts of the image impacted by the rolling shutter effect at the top and bottom of the photo.
- What is Rolling Shutter Correction?
Rolling shutter correction is a term used to describe ways to fix rolling shutter in images and video.
We’ve discussed a simple way to fix the jello effect by cropping a photo in editing software – you can even do this on your smartphone.
But what do you do if artefacts appear in the middle of the image? It can happen if you’re capturing footage or a photo of something moving super fast.
A classic example is airplane propellers. It’s moving so fast that even with an increased frame rate or shutter speed, the effect is still apparent.
Fortunately, there’s a range of editing software products to correct rolling effects.
When it comes to correcting rolling shutter in photos, Adobe Lightroom and Photoshop both have distortion correction tools.
These allow you to correctly align vertical things that are bent over or skew as a result of the distortion. You can align the whole image or align sections of the image if you get the hang of the software.
If you shoot video, Adobe Premiere Pro is a popular software solution used by videographers. It offers a Rolling Shutter Repair Effect tool to minimise the more apparent effects of the distortion.
Rolling shutter artifacts can also be removed using Adobe After Effects or one of its alternatives.
There are also many other video footage editing options that offer rolling shutter repair as part of the software or as plugins.
Final Words
While camera manufacturers are constantly seeking ways to reduce the rolling effect, this side effect of the combination of CMOS imagining sensors and fast-moving objects will always be apparent.
If your camera uses a CMOS sensor or a rolling shutter, being aware of rolling distortion is the first step to avoiding it.
From there, you can take further steps to prevent rolling shutter artifacts from showing up in your photos and videos.
Finally, in many cases, fixing it in both video recordings and photos is possible – you just need the right tools.
What are your thoughts on rolling shutters and the distortion effects they cause? Do you have a technique to avoid or correct the jello effect?
Share your thoughts and questions below and join the conversation. Happy shooting.

Check out these 8 essential tools to help you succeed as a professional photographer.
Includes limited-time discounts.


